Welcome back to Lab Build! In the previous post, we created our very first virtual machine within VirtualBox. Our next step in building out the lab is to set up our first domain controller. After setting up the domain controller, we will have access to Active Directory for domain management and DNS (Domain Name System) to enable devices on the network to communicate with each other.
Assign a Static IP
I recommend always powering down your virtual machines when they aren’t in use. Unlike a business, the lab environment can afford downtime whenever you want it. Scaling down your resources as a matter of habit will benefit you greatly if you ever manage resources in the cloud.
Open VirtualBox, select your VM, and click Start.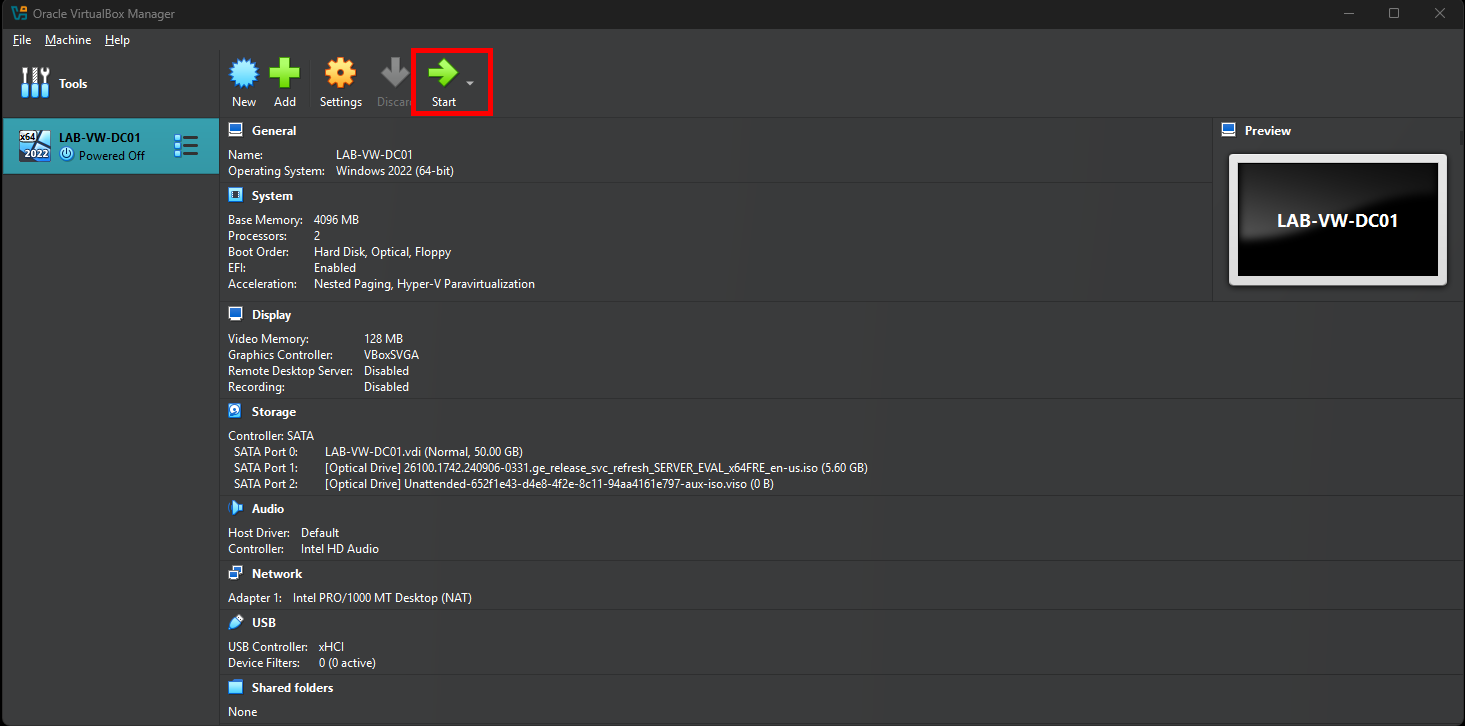
Sign into Windows and open Windows Terminal. Run the ipconfig command. Take note of your current IPv4, Subnet Mask, and Default Gateway listed in the output.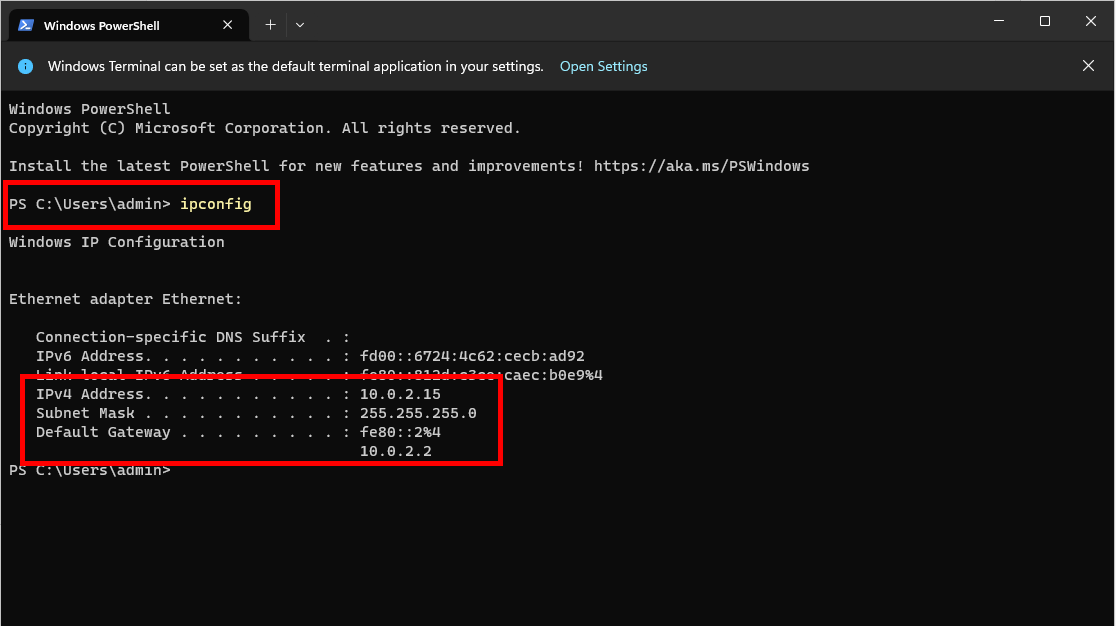
Right-click the network icon in your taskbar and select Network and Internet settings. Expand the Ethernet options. Take note of the IPv4 DNS servers field. We’ll use this in one of the next steps.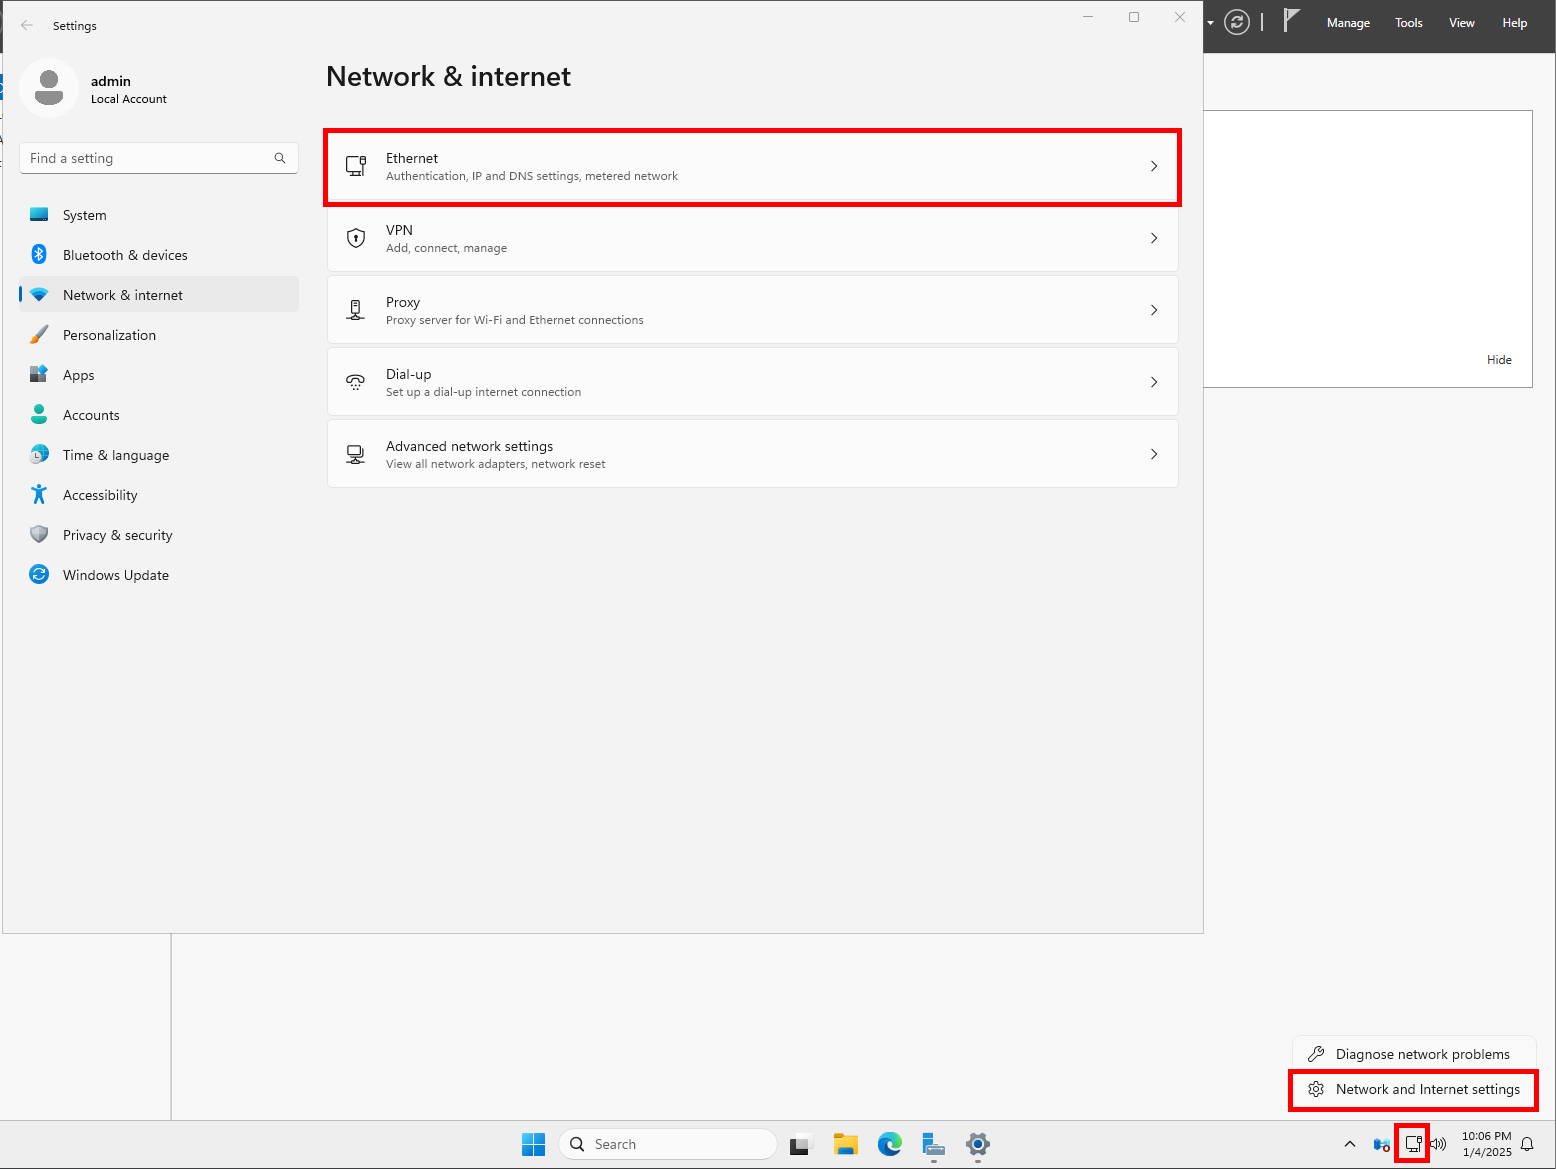
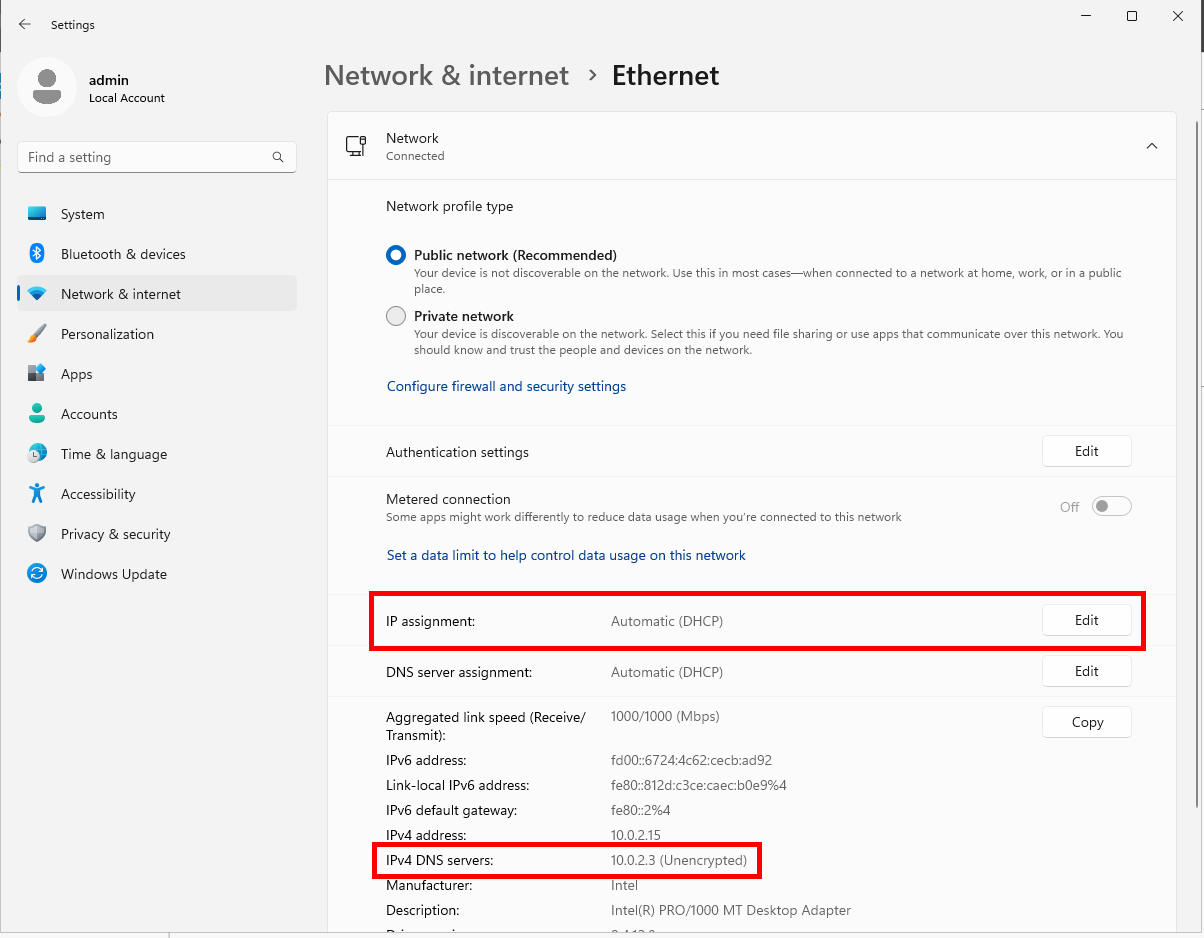
Click Edit next to IP assignment and switch from Automatic (DHCP) to Manual. Click Save.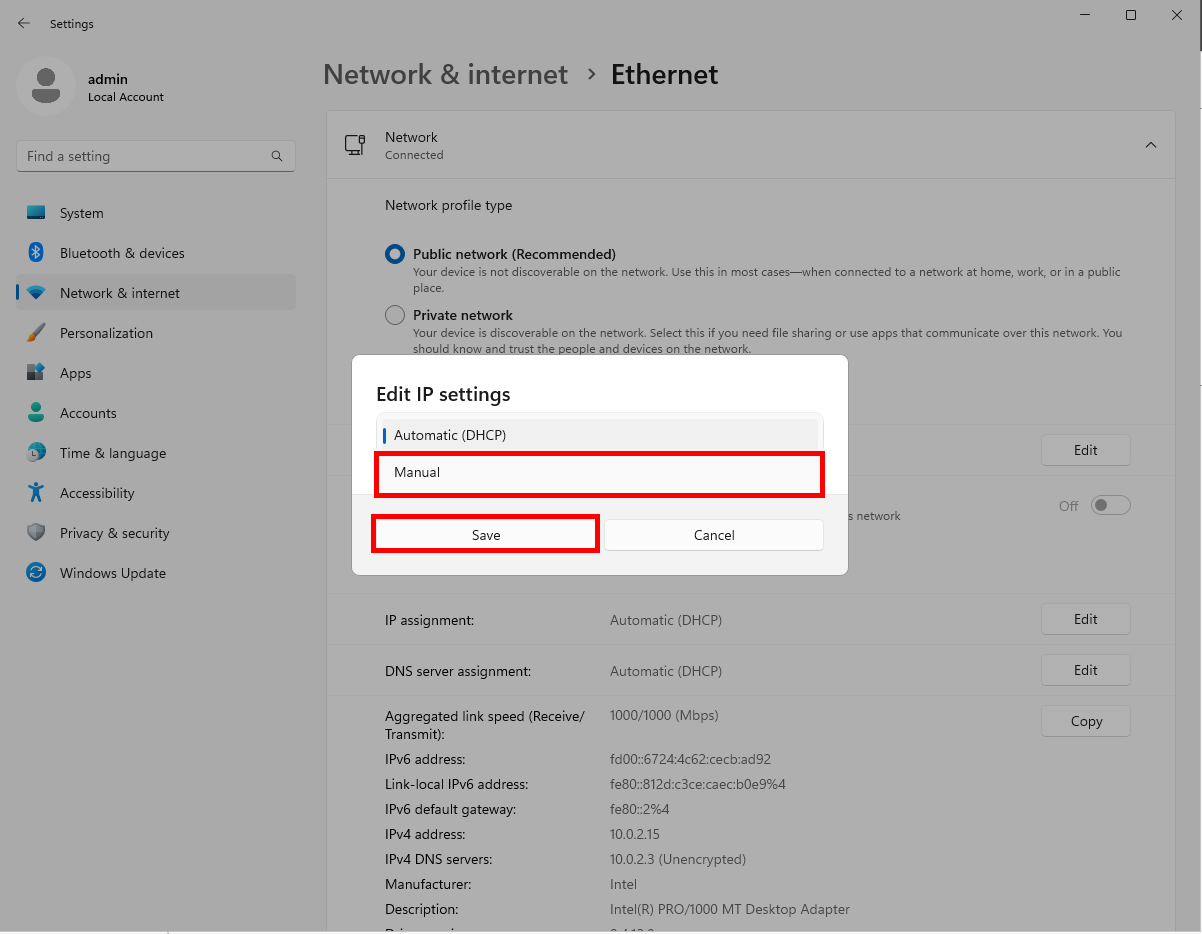
DHCP (Dynamic Host Configuration Protocol) assigns IP addresses and other configuration information to network-connected devices. Perhaps a future post on the workings of DHCP will be beneficial? Let me know!
Switch IPv4 to On. Input your IP address, Subnet mask, Default Gateway, and Preferred DNS that we previously gathered. Click Save.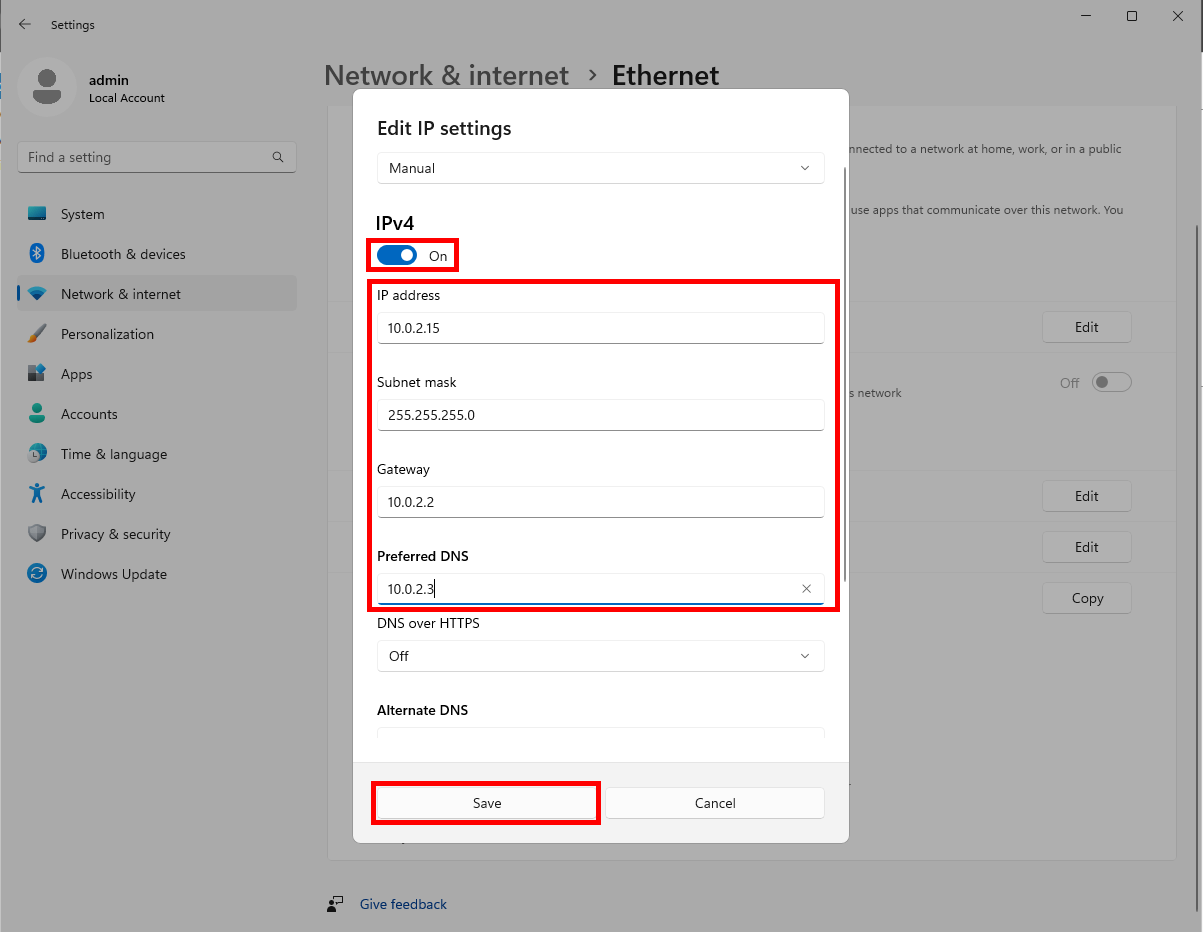
Verify the virtual machine has a connection to the internet. Let’s also verify it is pulling an IPv4 address by opening Windows Terminal and running the ipconfig command again. You should see the IP address you statically assigned to the machine.
Install Active Directory Domain Services (AD DS)
Active Directory Domain Services stores directory data and makes this data available to network users and administrators. This data includes information on user accounts, such as names, passwords, and phone numbers, and enables other authorized users to access this information.
Open Server Manager by clicking the Windows Start button and searching for “server manager.” Click on Server Manager.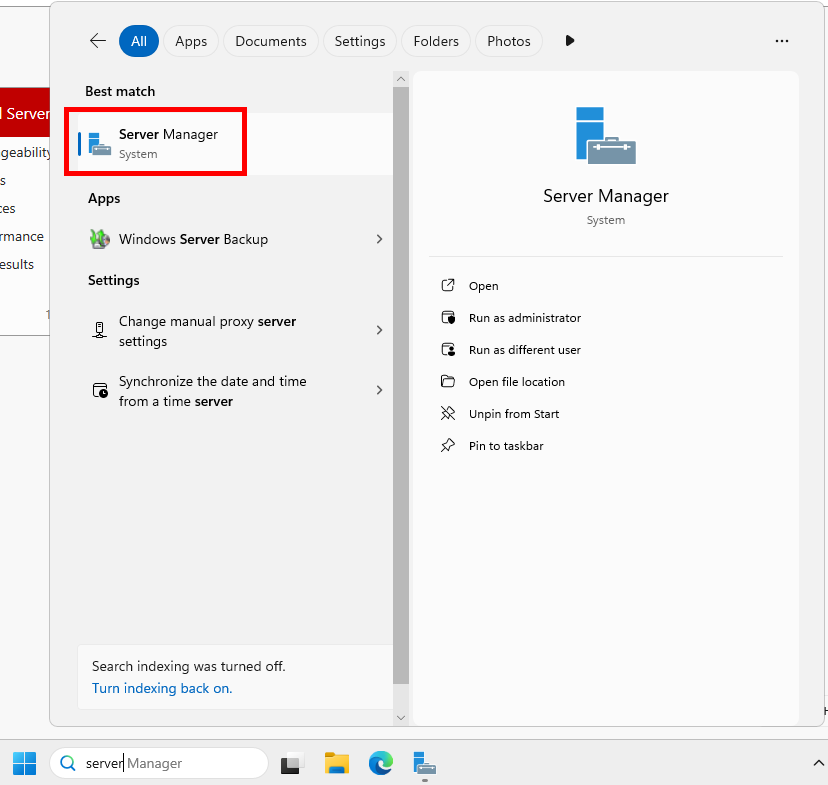
Click Manage and select Add Roles and Features from the menu dropdown.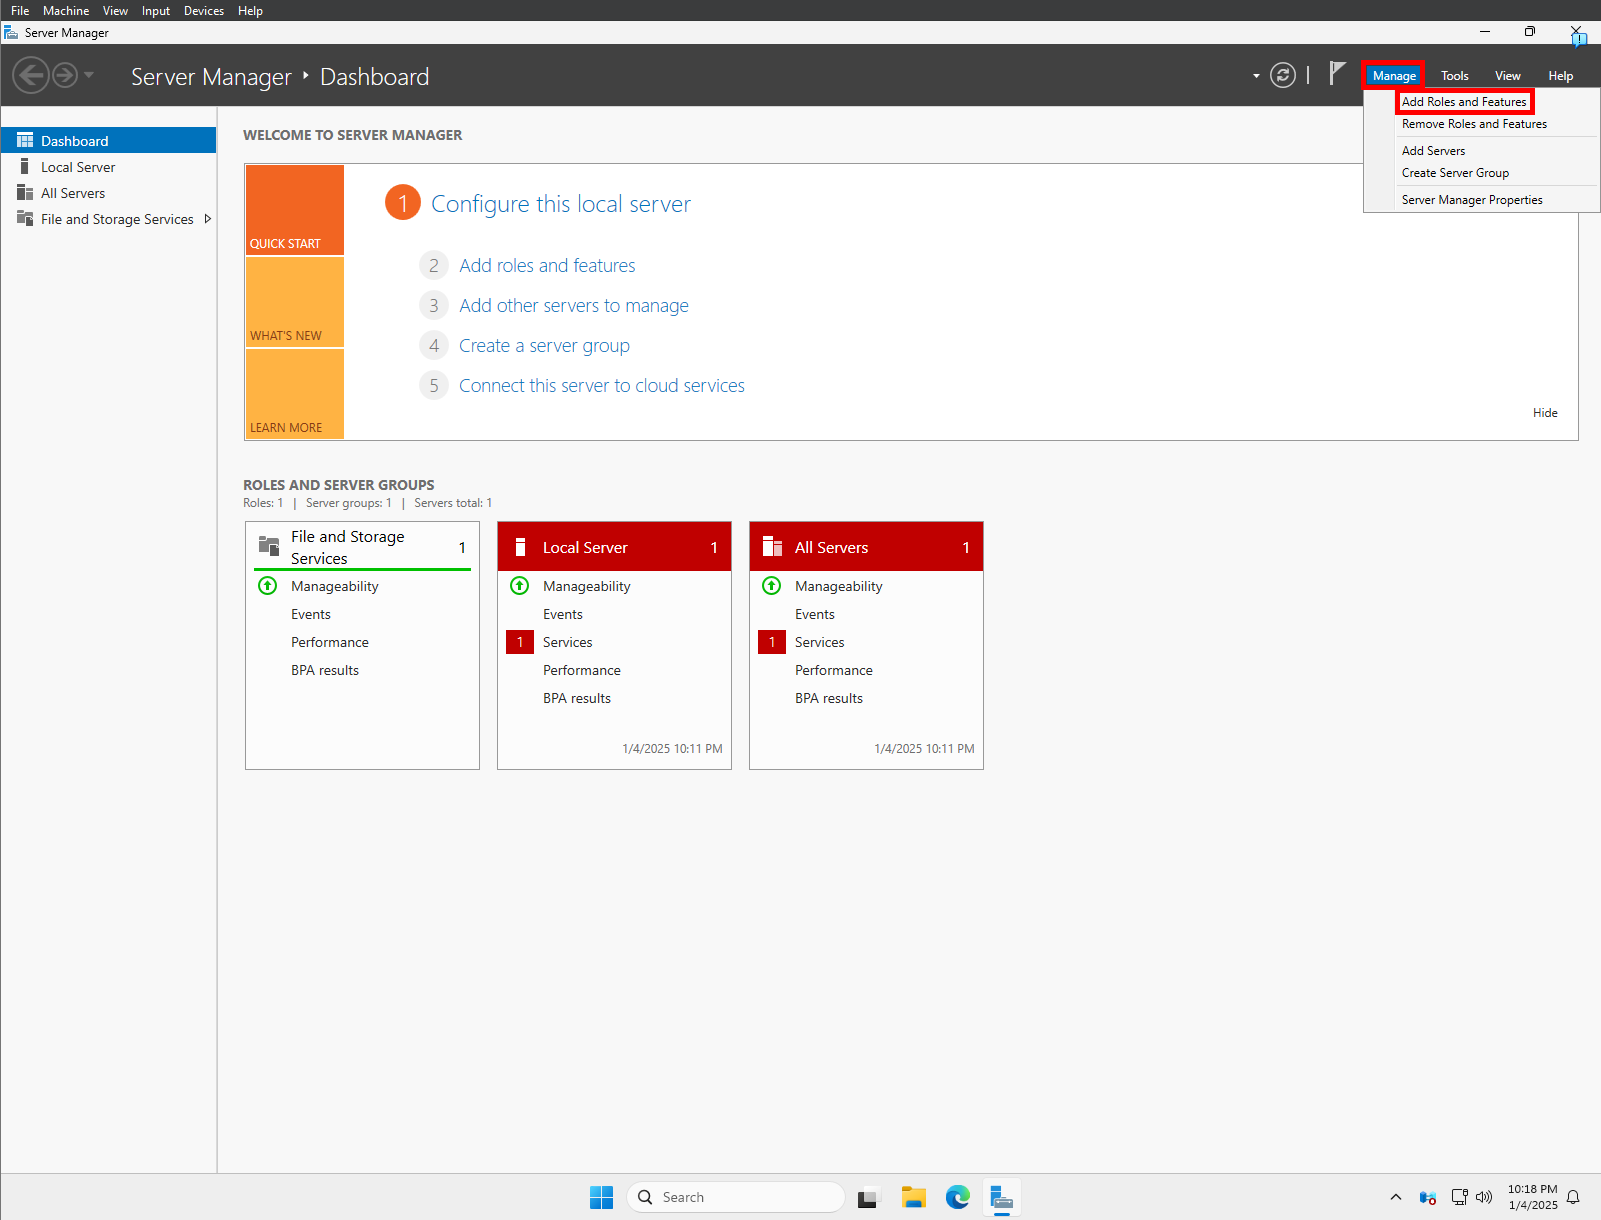
Work through the Add Roles and Features Wizard:
On the Before you begin screen, click Next.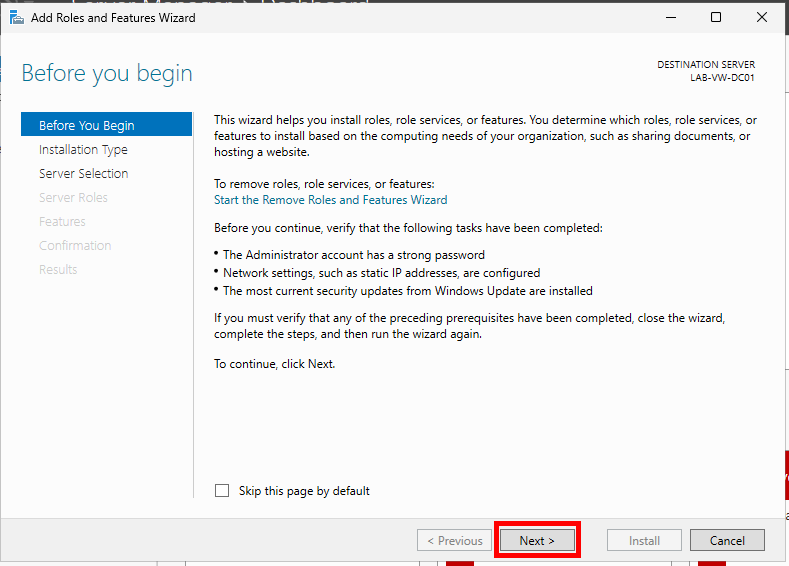
Choose Role-based or feature-based installation and click Next.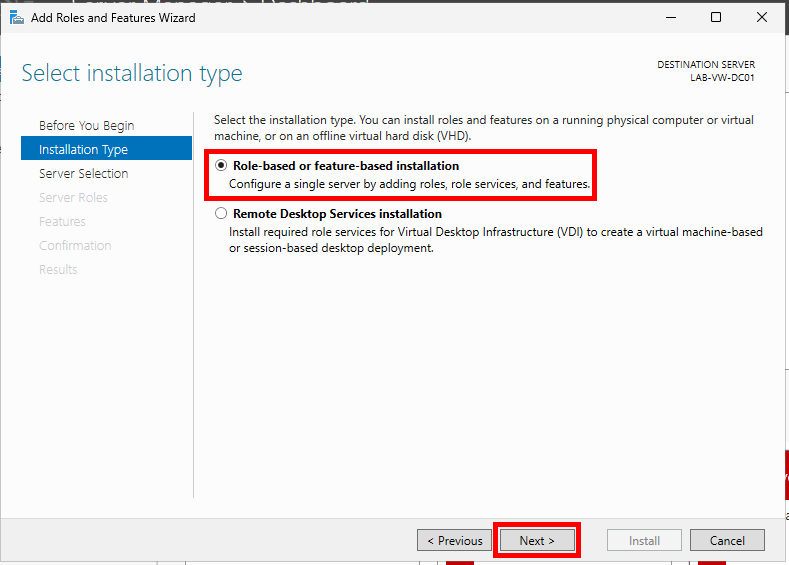
Choose Select a server from the server pool (default option), highlight your server, and click Next.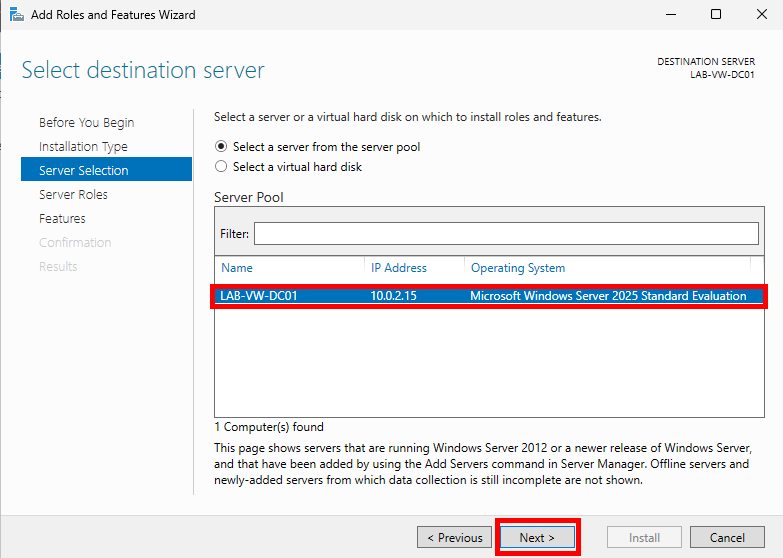
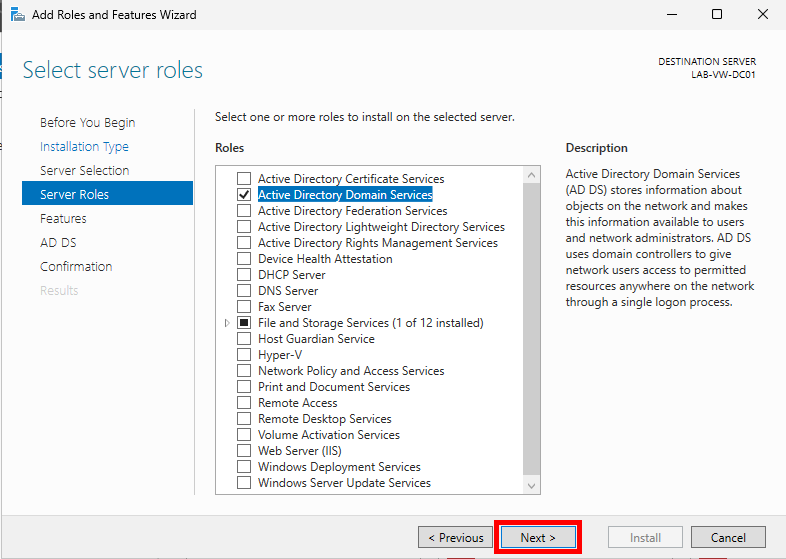
Under Roles, select Active Directory Domain Services. An Add Roles and Features Wizard pop-up will appear. Ensure the Include management tools (if applicable) checkbox is checked and select Add Features. Then click Next.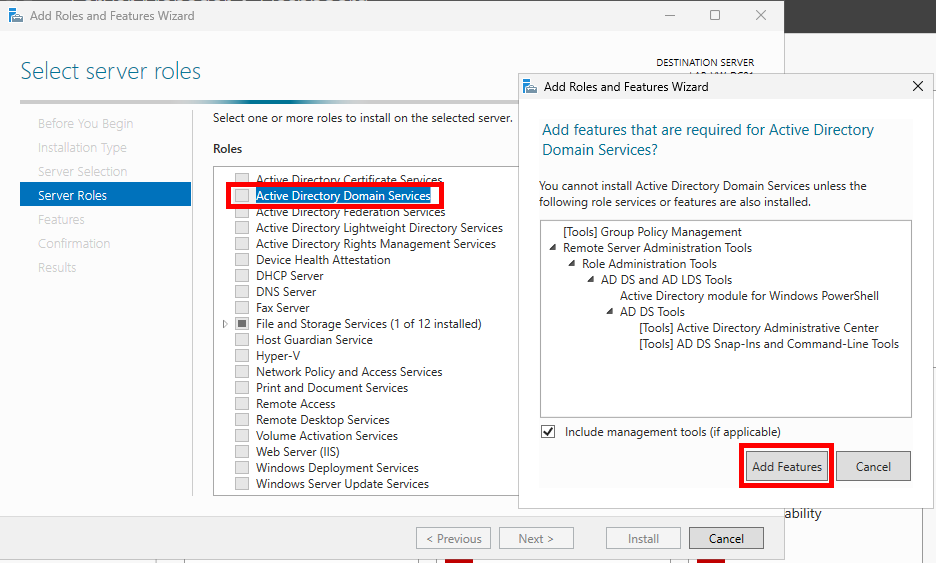
Leave everything as default on the Features page and click Next.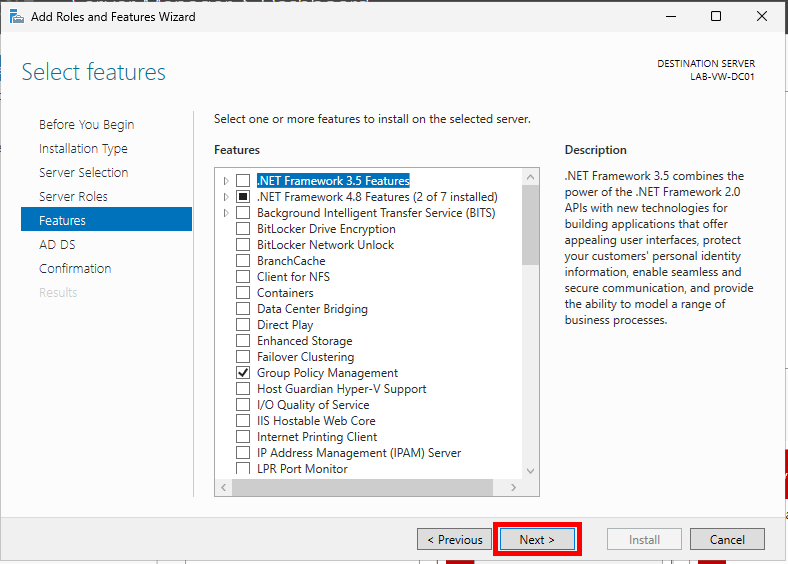
On the AD DS section, click Next.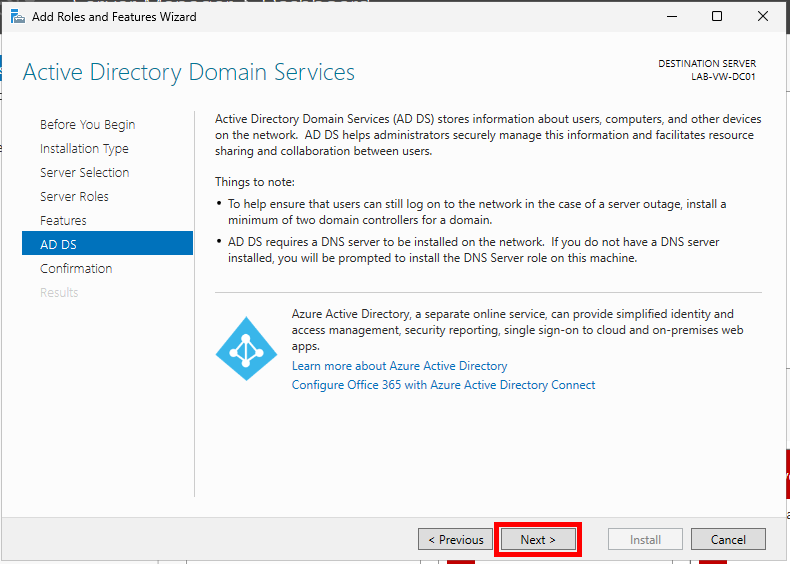
You’ll notice a note that AD DS requires a DNS server to be installed on the network. The DNS Server role will be installed on the machine as part of this installation. No need to worry!
Finally, click Install.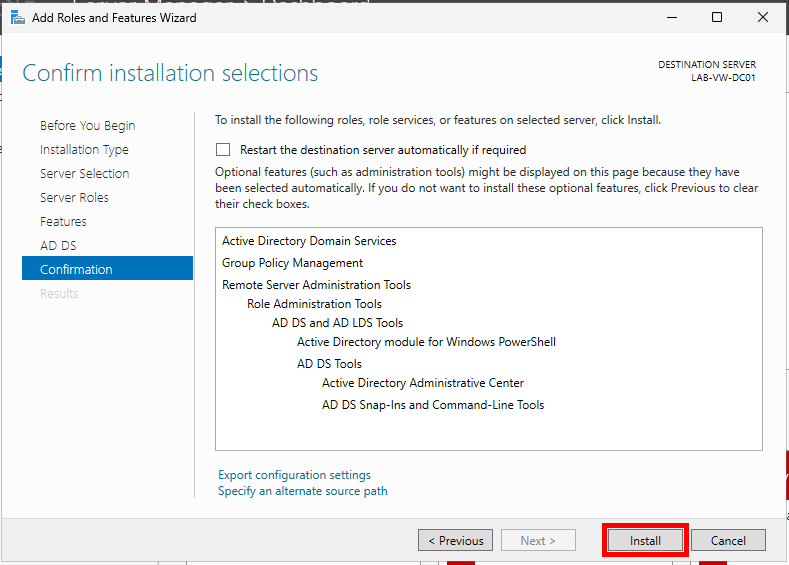
You can close out of the wizard and wait for the notification in the command bar to appear or watch the installation progress. It’s up to you. If you’d like to skip but have FOMO, here’s a picture of what you’re missing out on.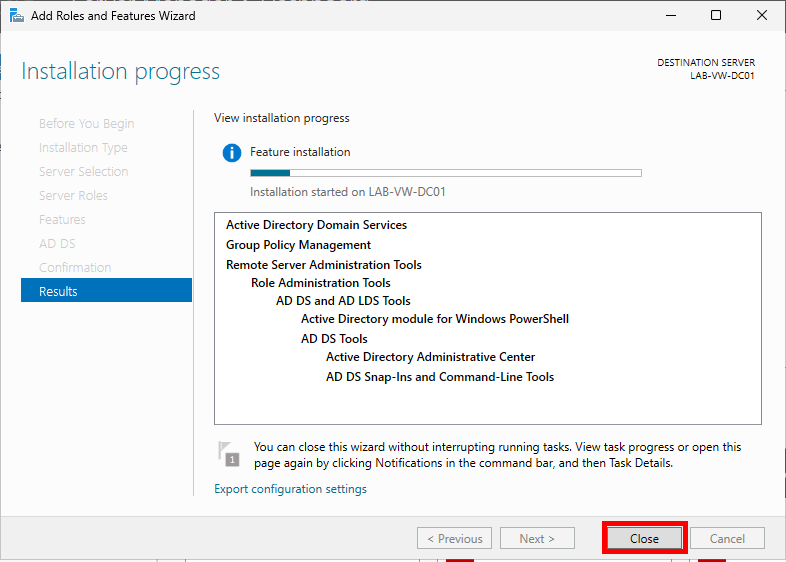
Promote the Server to a Domain Controller
Once the feature installation has completed, you should see a notification icon in the top-right corner of Server Manager. Click it and select Promote this server to a domain controller.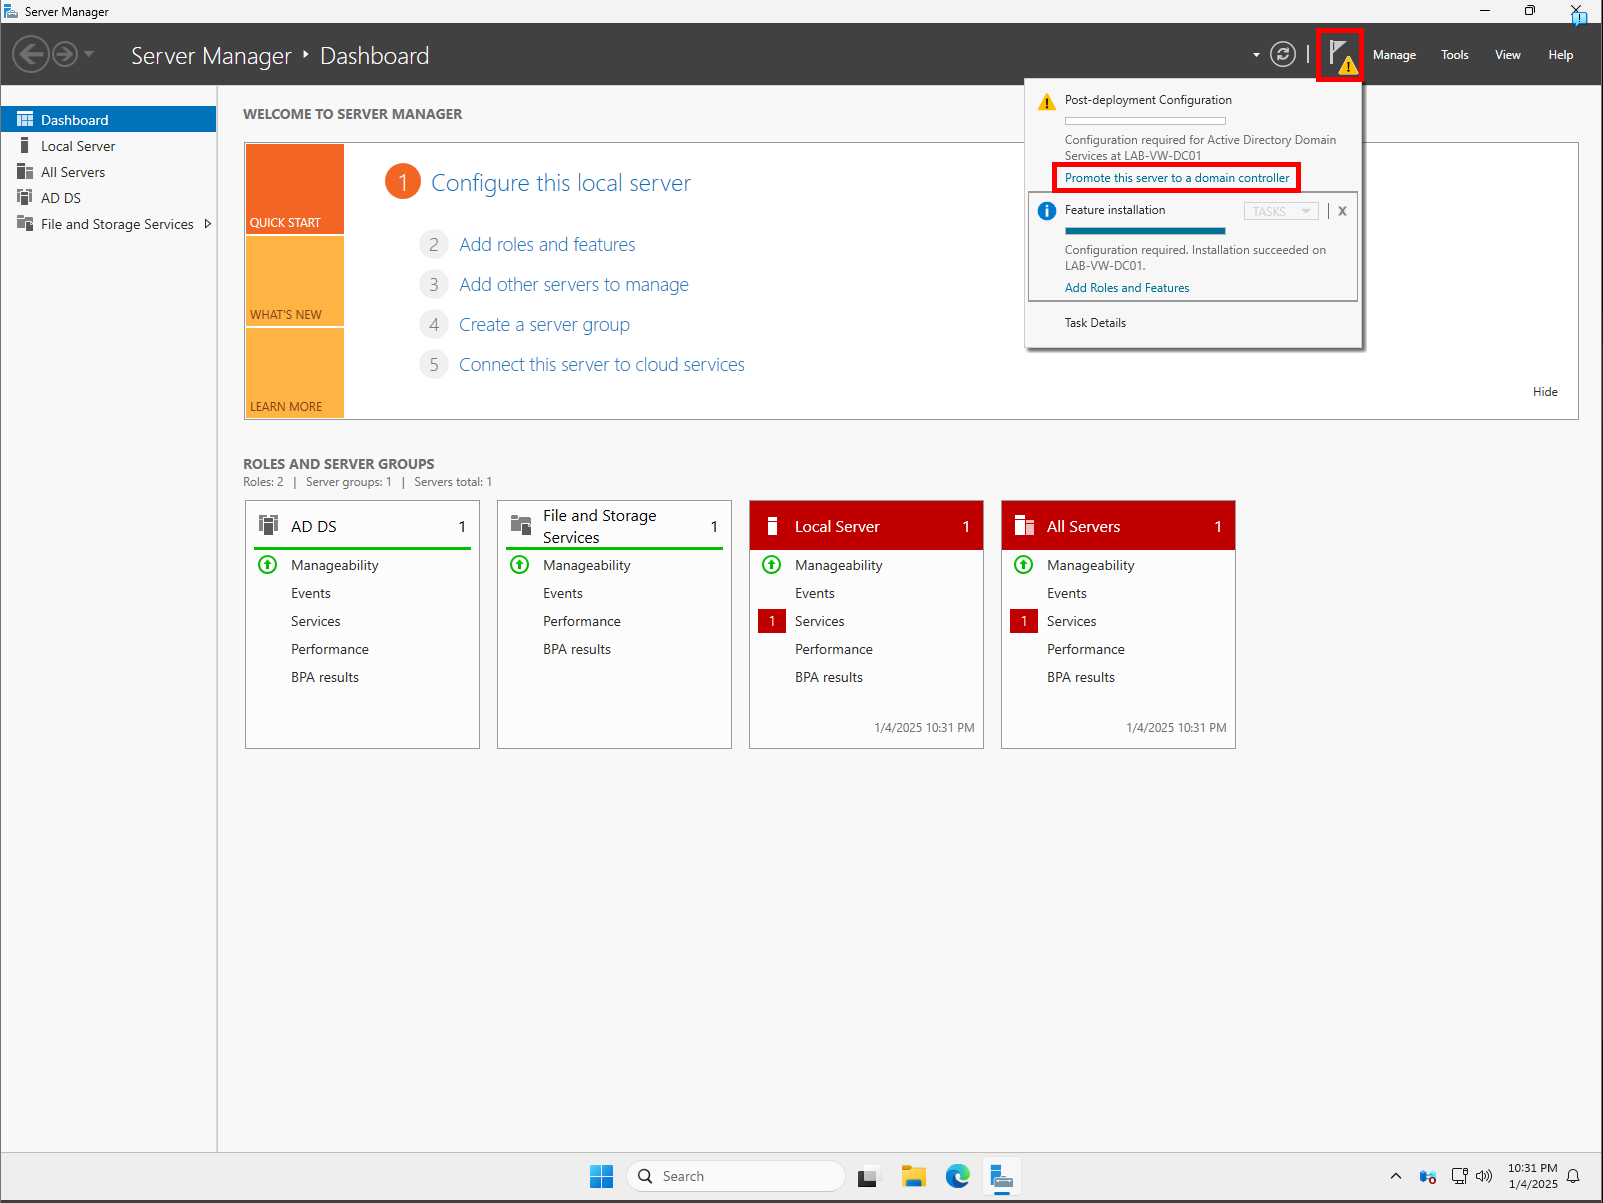
The Active Directory Domain Services Configuration Wizard will appear. Select the Add a new forest option and specify a Root domain name. If you’ve been following the previous posts, use the domain name you originally gave your virtual machine when you created it.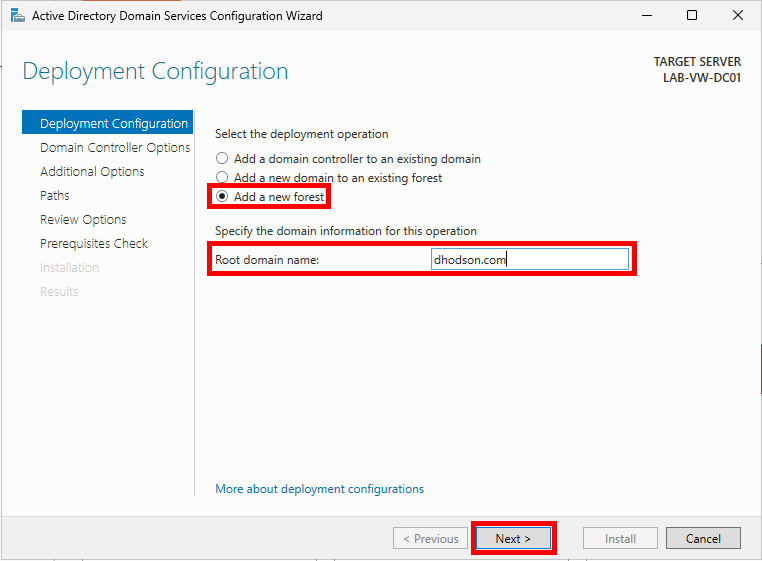
Leave the Forest functional level and Domain functional level as the default Windows Server 2025. Make sure Domain Name System (DNS) server is checked. Add and confirm a strong password for Directory Services Restore Mode (DSRM) and store it in your password manager of choice.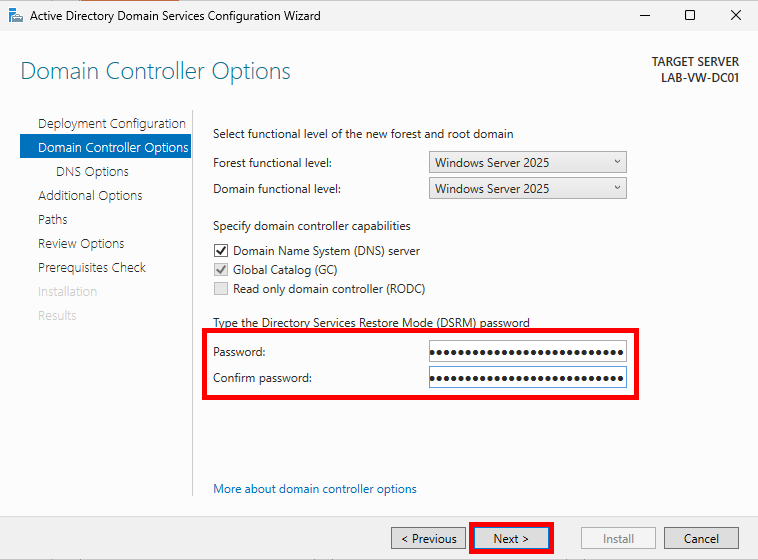
The DSRM password is used for recovery of Active Directory, to perform maintenance tasks like restoring the Active Directory database from a backup, repairing SYSVOL, or for emergency access if all domain admin accounts are locked out or inaccessible.
Seal it tighter than grandma’s jam jar. Bury it deeper than pirate treasure. It’s classified, like Area 51 but cooler. (Put these here for you, Brian.)
Nothing is required on the DNS Options page. You can ignore the message up top and click Next. DNS will be handled during the installation.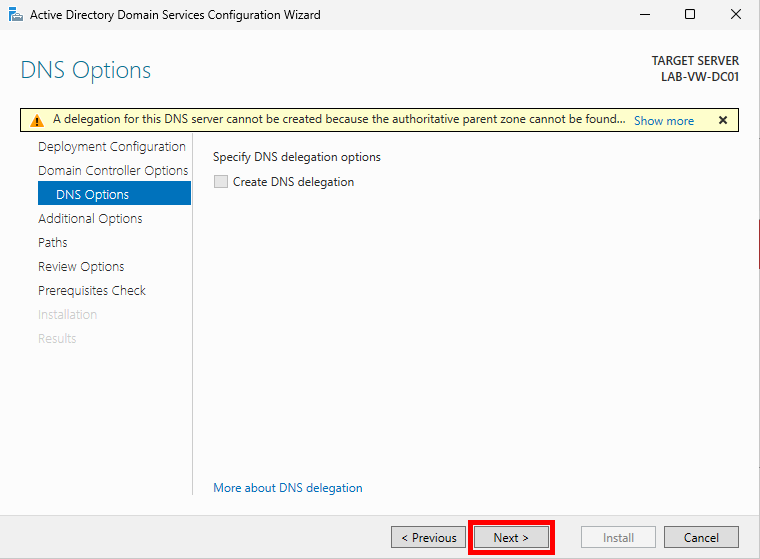
On the Additional Options page, a default NetBIOS name will be generated. You can leave it as is and click Next.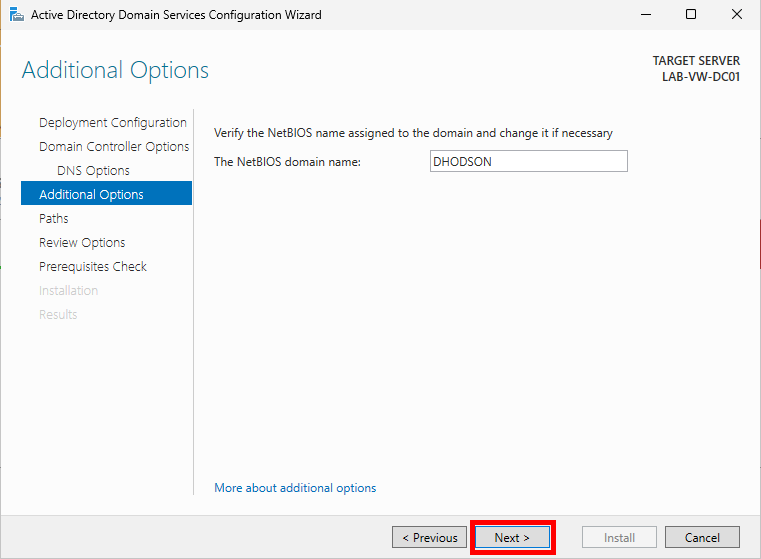
Leave the paths to the Database, log files, and SYSVOL folders as their defaults and click Next.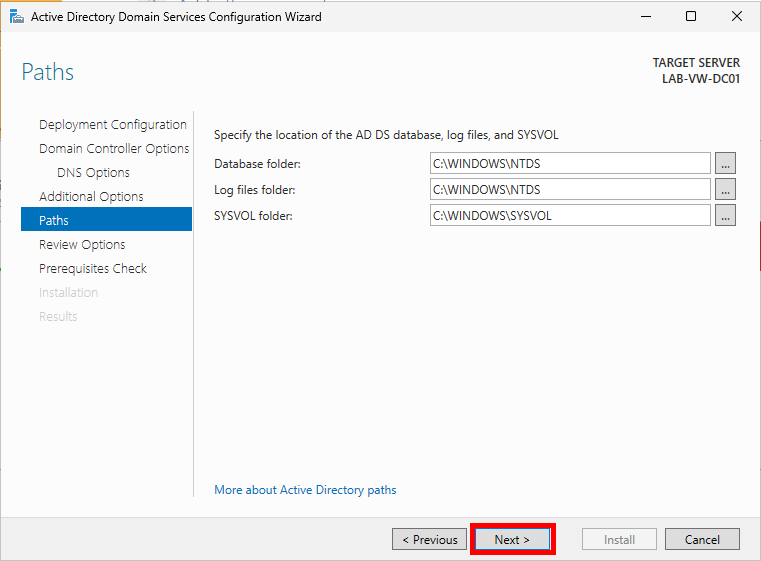
Important notes for the next step:
The password of the new domain Administrator will be the same as the local Administrator account you are currently logged in to.
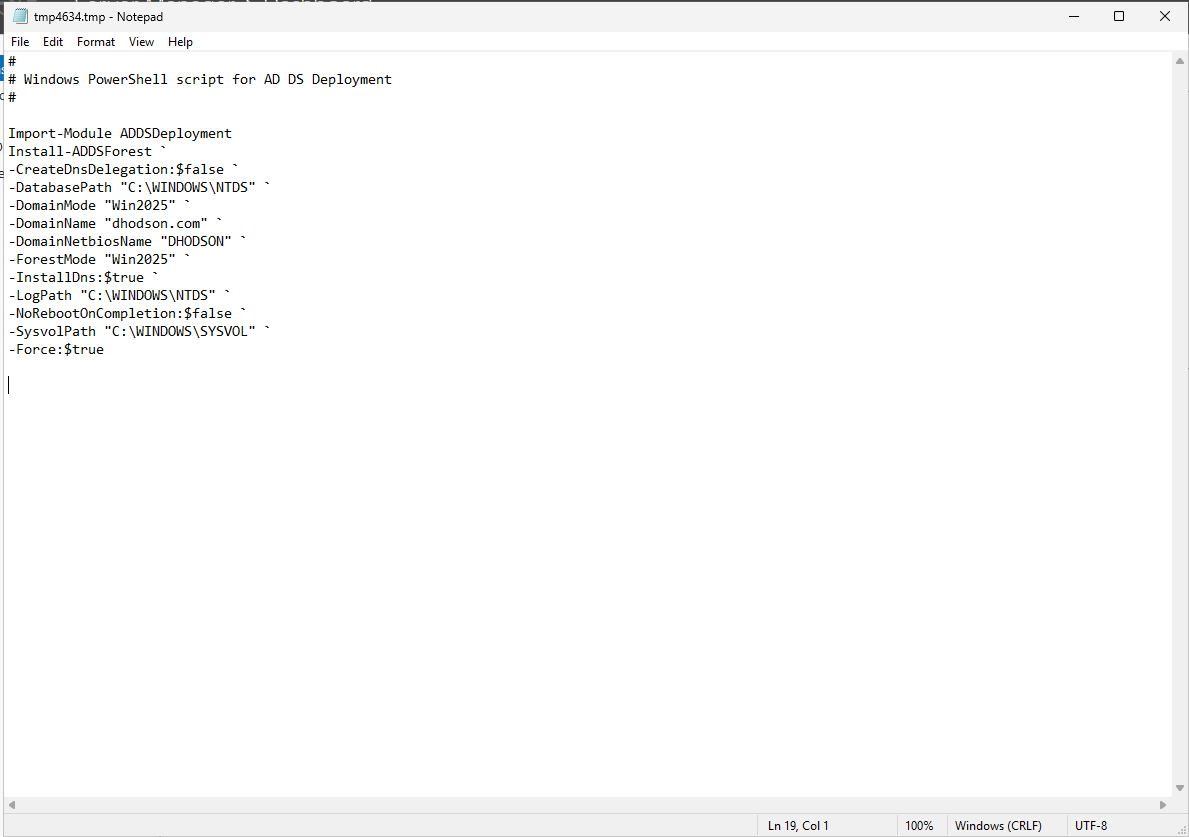
Save the PowerShell script downloaded by clicking View script. This will allow you to automate the creation of future domain controllers. If you have to do something more than once, automate it!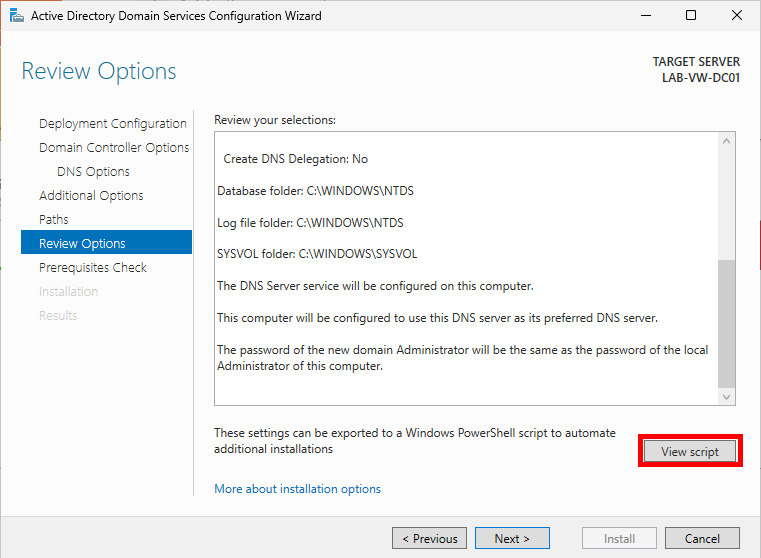
Review your selections and click Next.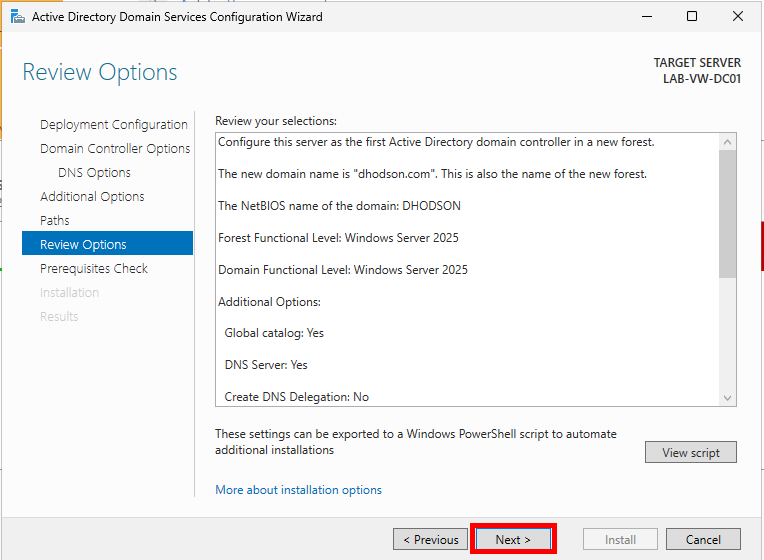
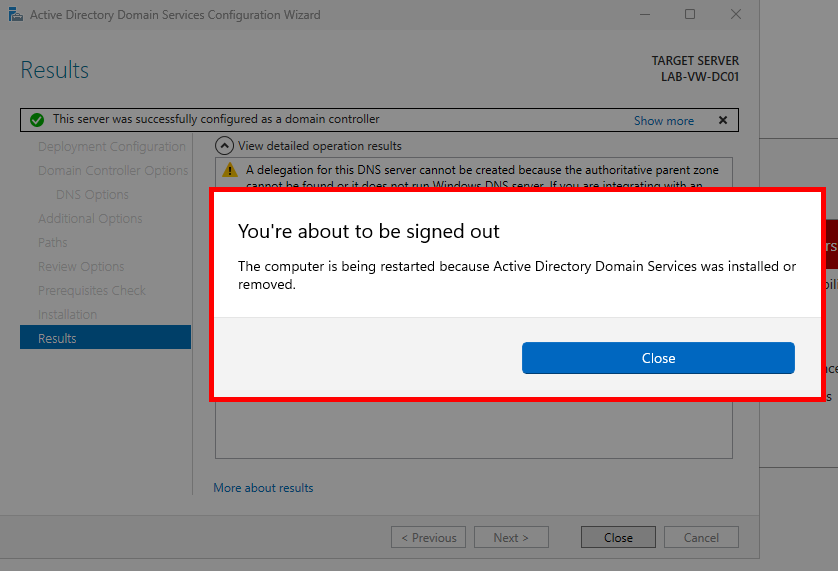
Finally, click Install. Ignore any DNS server warnings. The server will automatically reboot at the end of the promotion.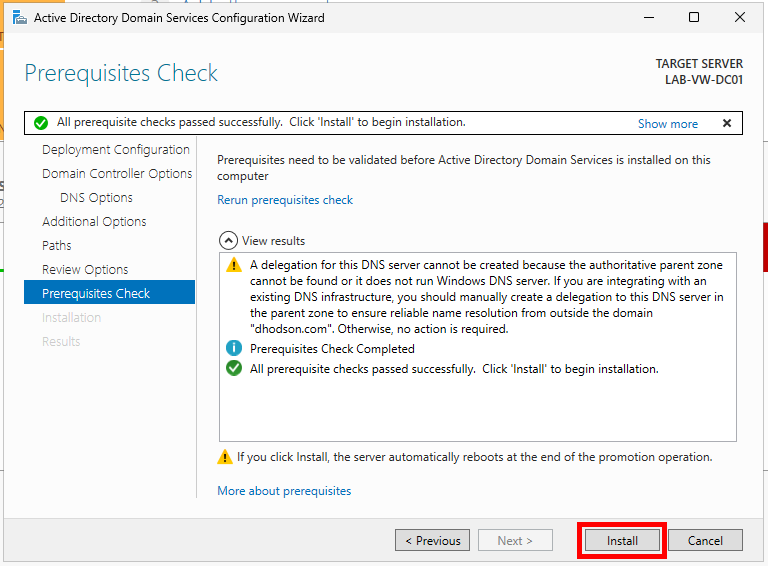
Verify the Domain Controller
Congrats! The domain controller has now been promoted. As with anything in tech, let’s double-check.
Sign in to the domain controller with the username Administrator and your previous local account’s password. You should notice a Sign in to: <Domain Name> message under the password field. This shows that we’re signing into the domain versus the local computer. 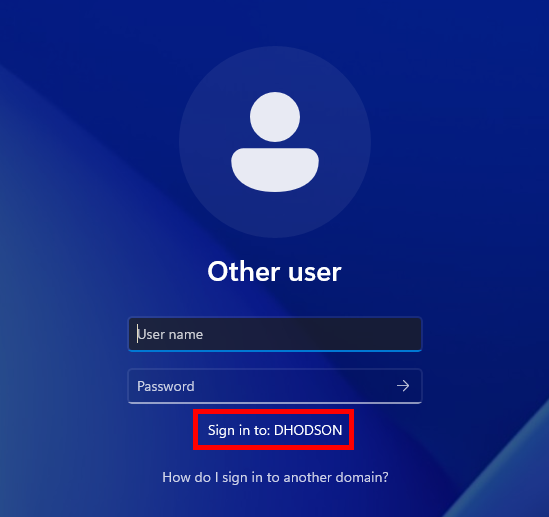
Now that we’ve signed in with a domain account, let’s verify Active Directory on the server. Click the Windows Start button and search for Active Directory. Click Active Directory Users and Computers (ADUC). You should see the domain name we created.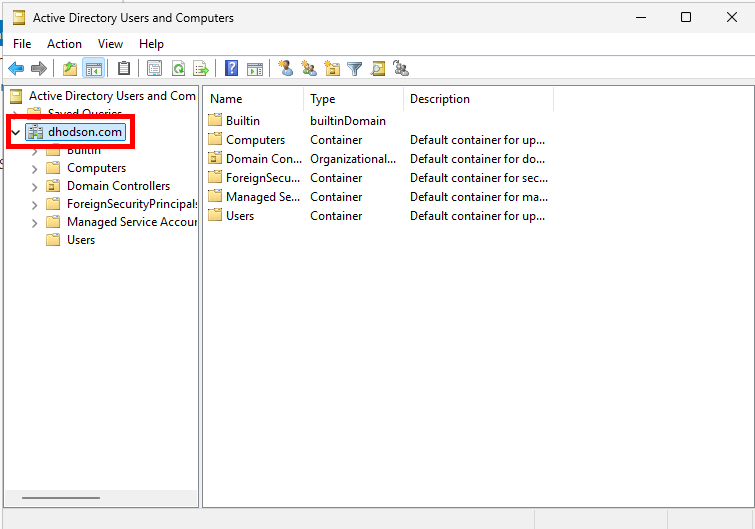
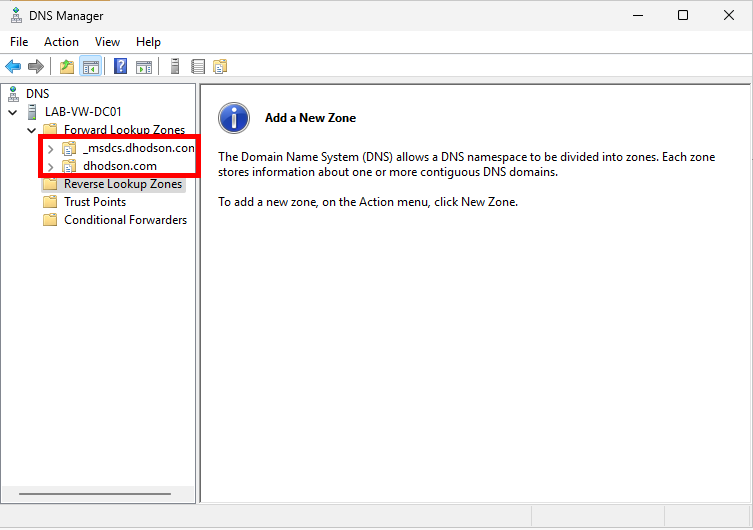
Next, verify that DNS is set up. Head back to Server Manager, click Tools, and then DNS. This opens Windows DNS Manager. Expand <Your computer name> and Forward Lookup Zones. You should see your domain name and a _msdcs.<your domain name> folder. 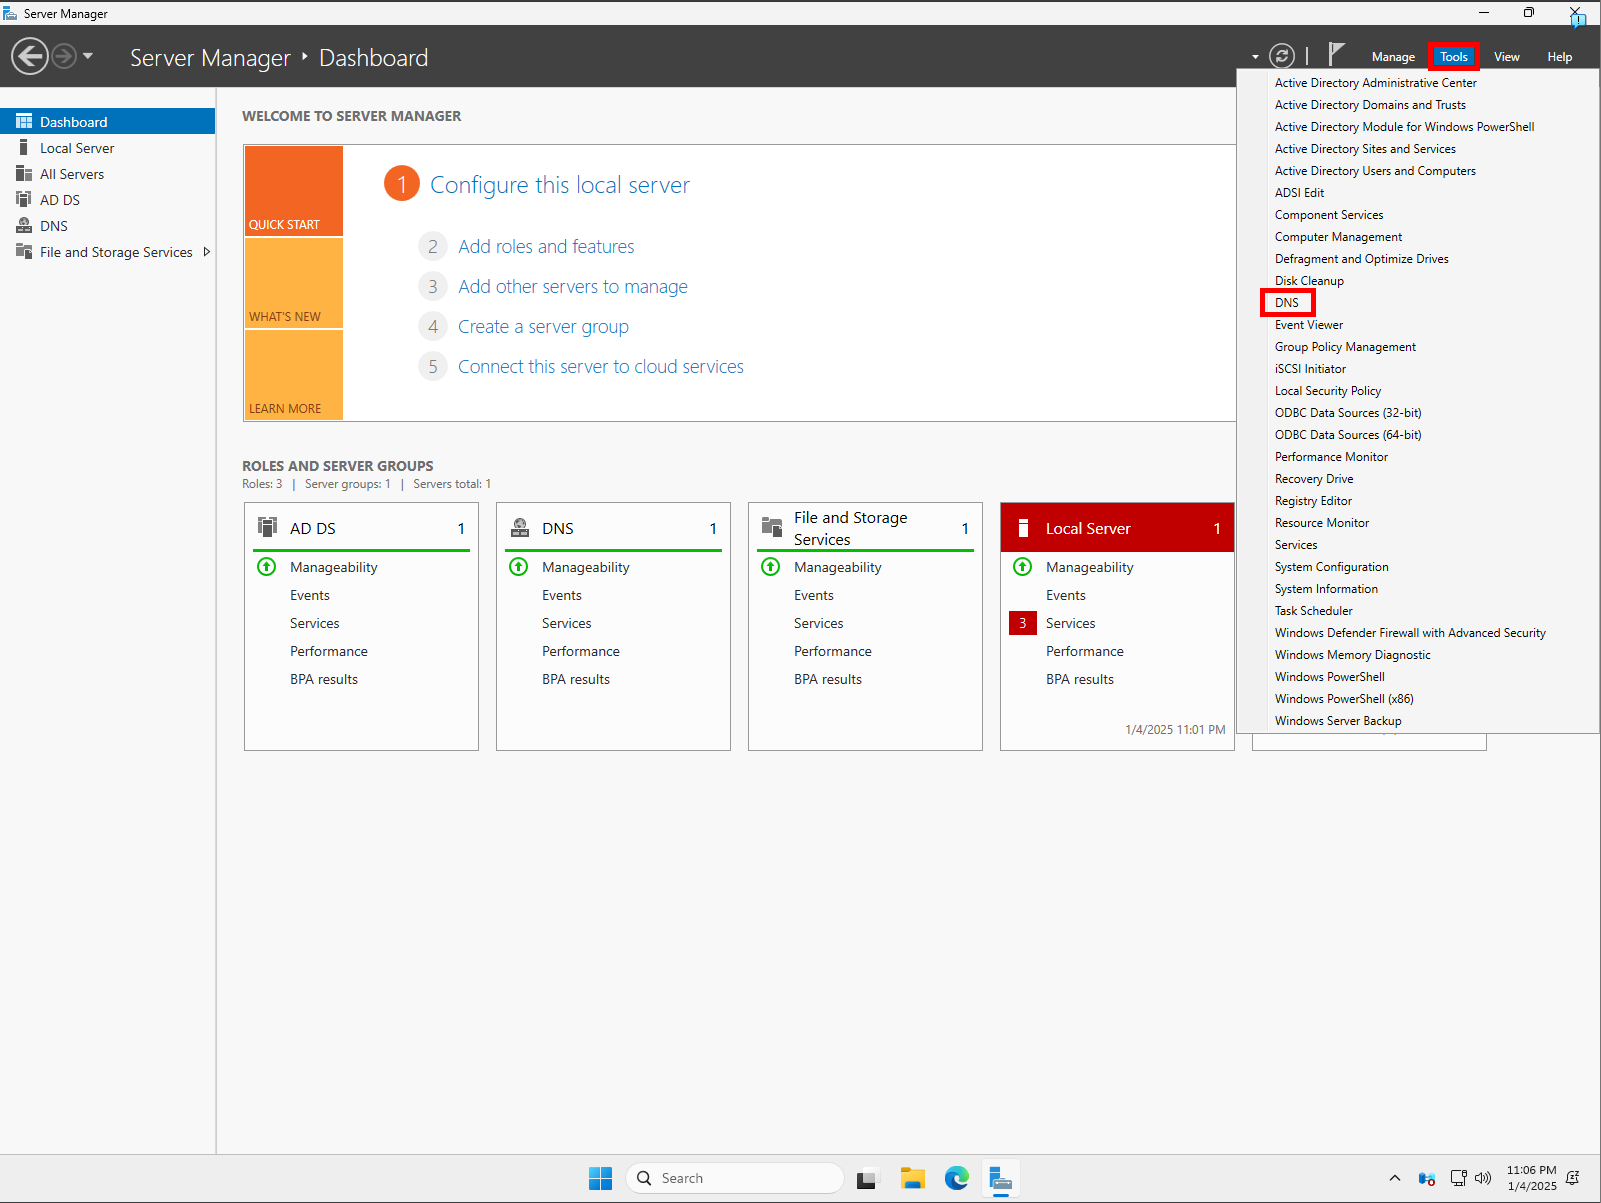
Open Windows Terminal and run the following commands to ensure the name resolves to the static IP address:nslookup <your domain name>
nslookup -type=SRV _ldap._tcp.<your domain name>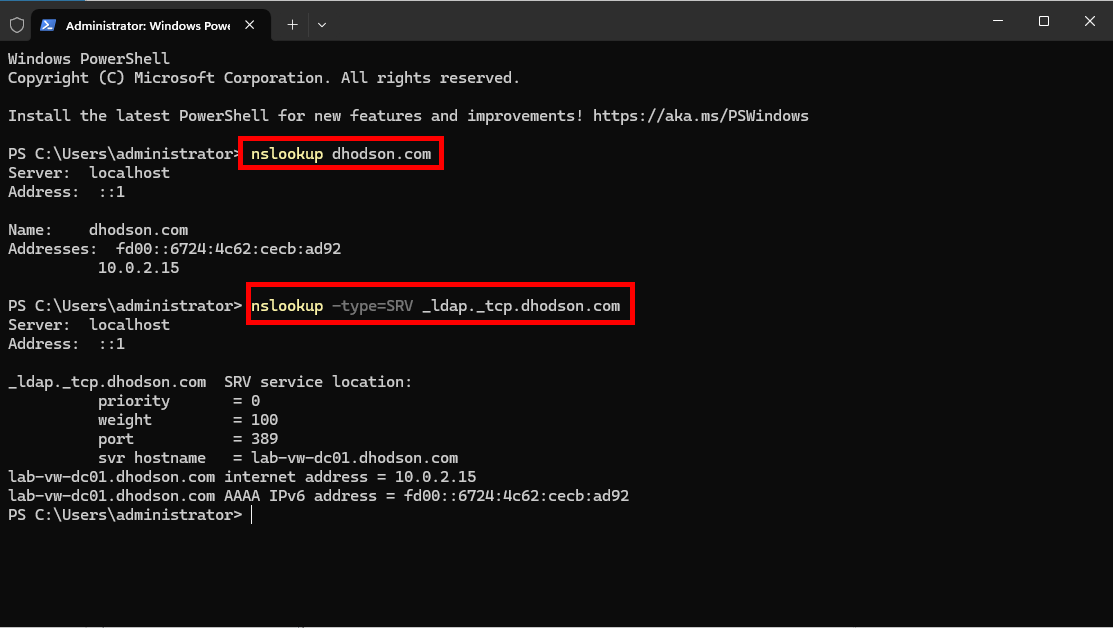
Final Task
Now that we’ve verified the domain controller, let’s synchronize the domain controller’s time with an external source (time.windows.com) and mark it as a reliable time source for the domain.
Domain-joined computers will automatically sync to the domain controller as a time source. I recommend setting up an NTP (Network Time Protocol) server, which may be covered in a future post.
Run these commands in Windows Terminal:
w32tm /config /manualpeerlist:"time.windows.com" /syncfromflags:manual /reliable:YES /updatew32tm /resync
You should see a The command completed successfully message after running them.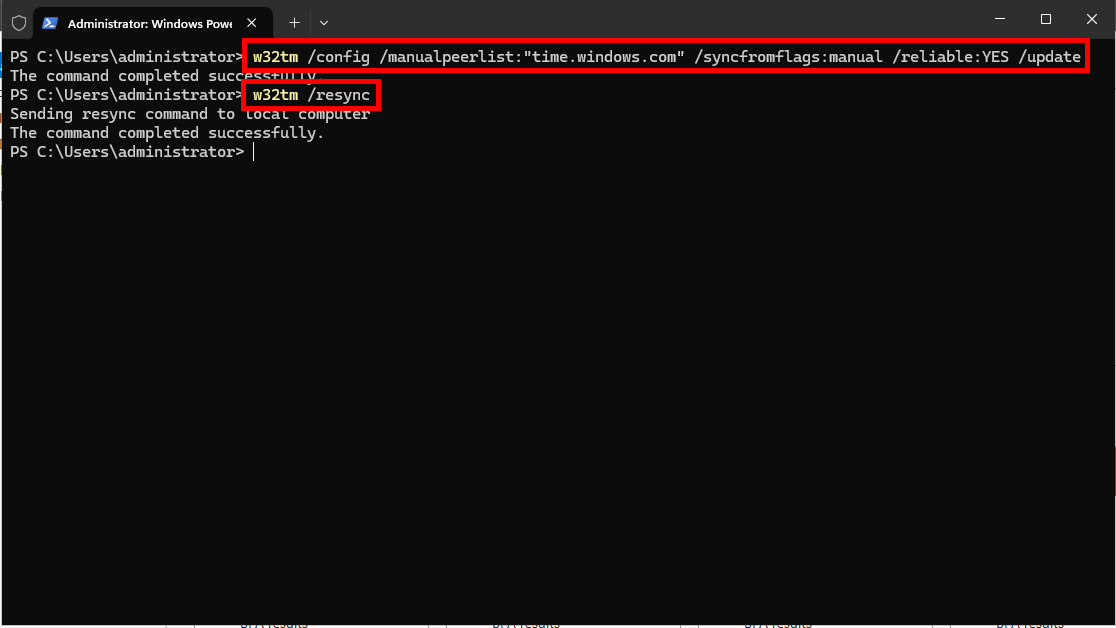
And there we have it—the domain controller for our lab is up and running! Until next time, people!
