In our last Lab Build post, we covered installing the hypervisor (VirtualBox) that will be used to create virtual machines (VMs) for the lab. In this post, we’ll focus on creating our very first Windows Server virtual machine in the lab, which will serve as our domain controller.
What is a domain controller? A domain controller manages and authenticates access to network resources within an Active Directory (AD)-based environment. You’ll likely see Active Directory (hosted on-premises, within Microsoft Azure, or hybrid—a combination of both) at nearly every major company. You can think of AD as the HR department of a company’s technology—it keeps a central database of all employees (users), their roles (groups), and their assigned equipment (computers, printers, etc.). AD also enforces company-wide rules and policies (Group Policy).
So…let’s dive into our virtual machine creation!
1. Download a Windows Server ISO
For our lab, we’ll be using an evaluation edition of Windows Server 2025. Evaluation editions are trial versions of Windows operating systems provided by Microsoft, free of charge, for 180 days.
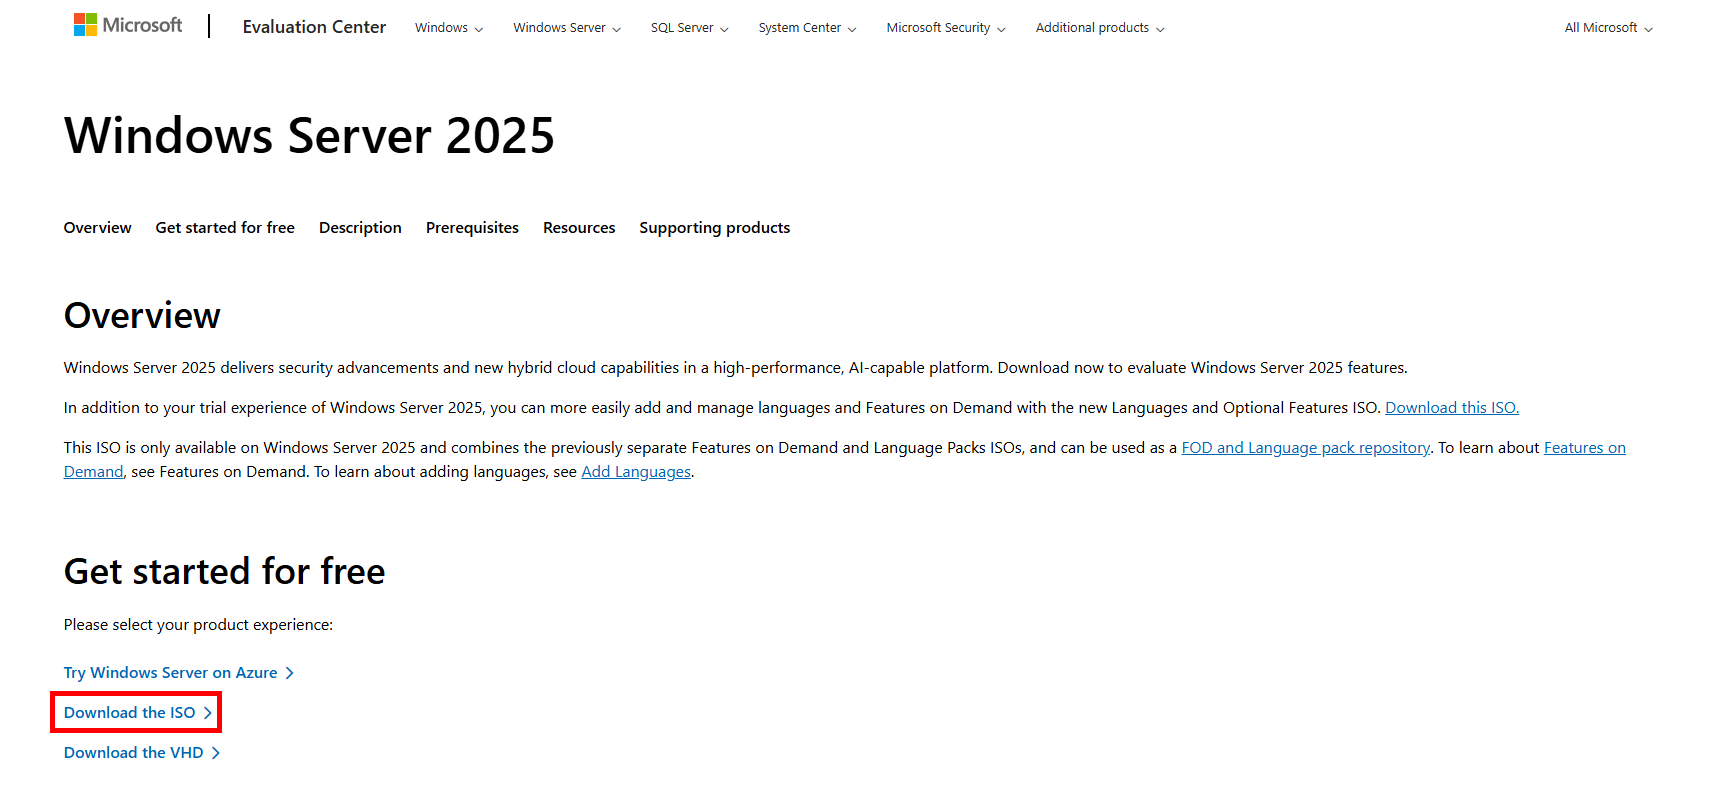
- Beam yourself up to https://www.microsoft.com/en-us/evalcenter/evaluate-windows-server-2025#Get-started, Scotty!
- Click on Download the ISO.
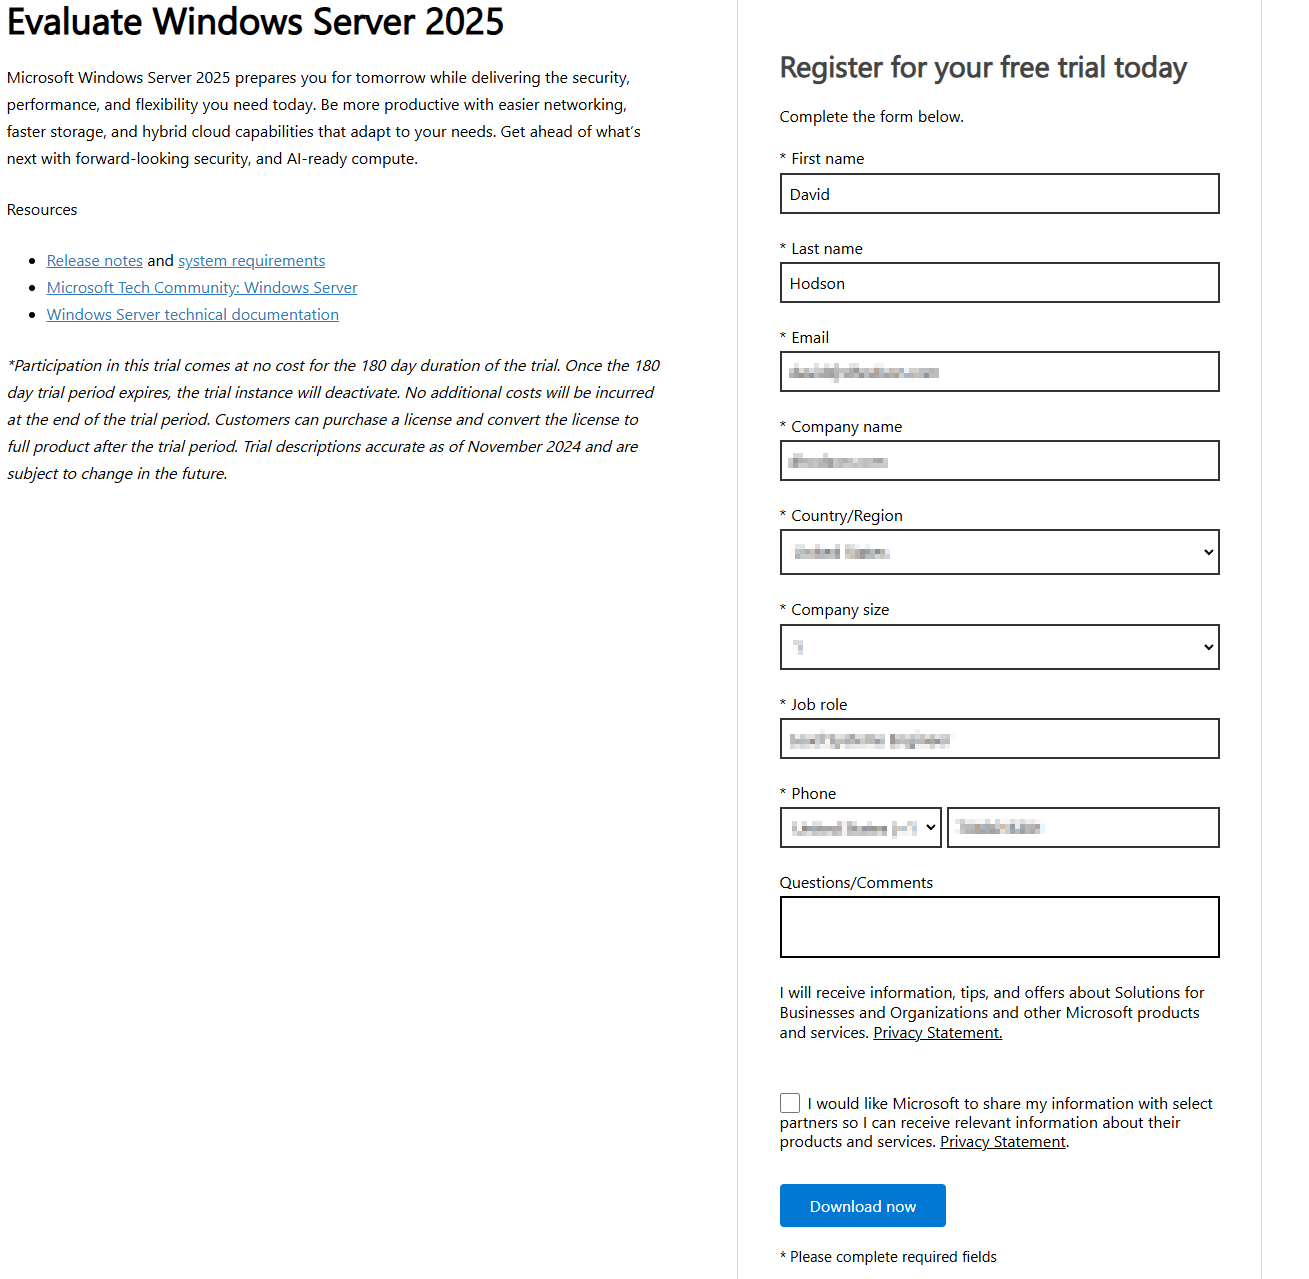
- Complete the registration form required to get an evaluation edition of Windows Server 2025, then click Download now.
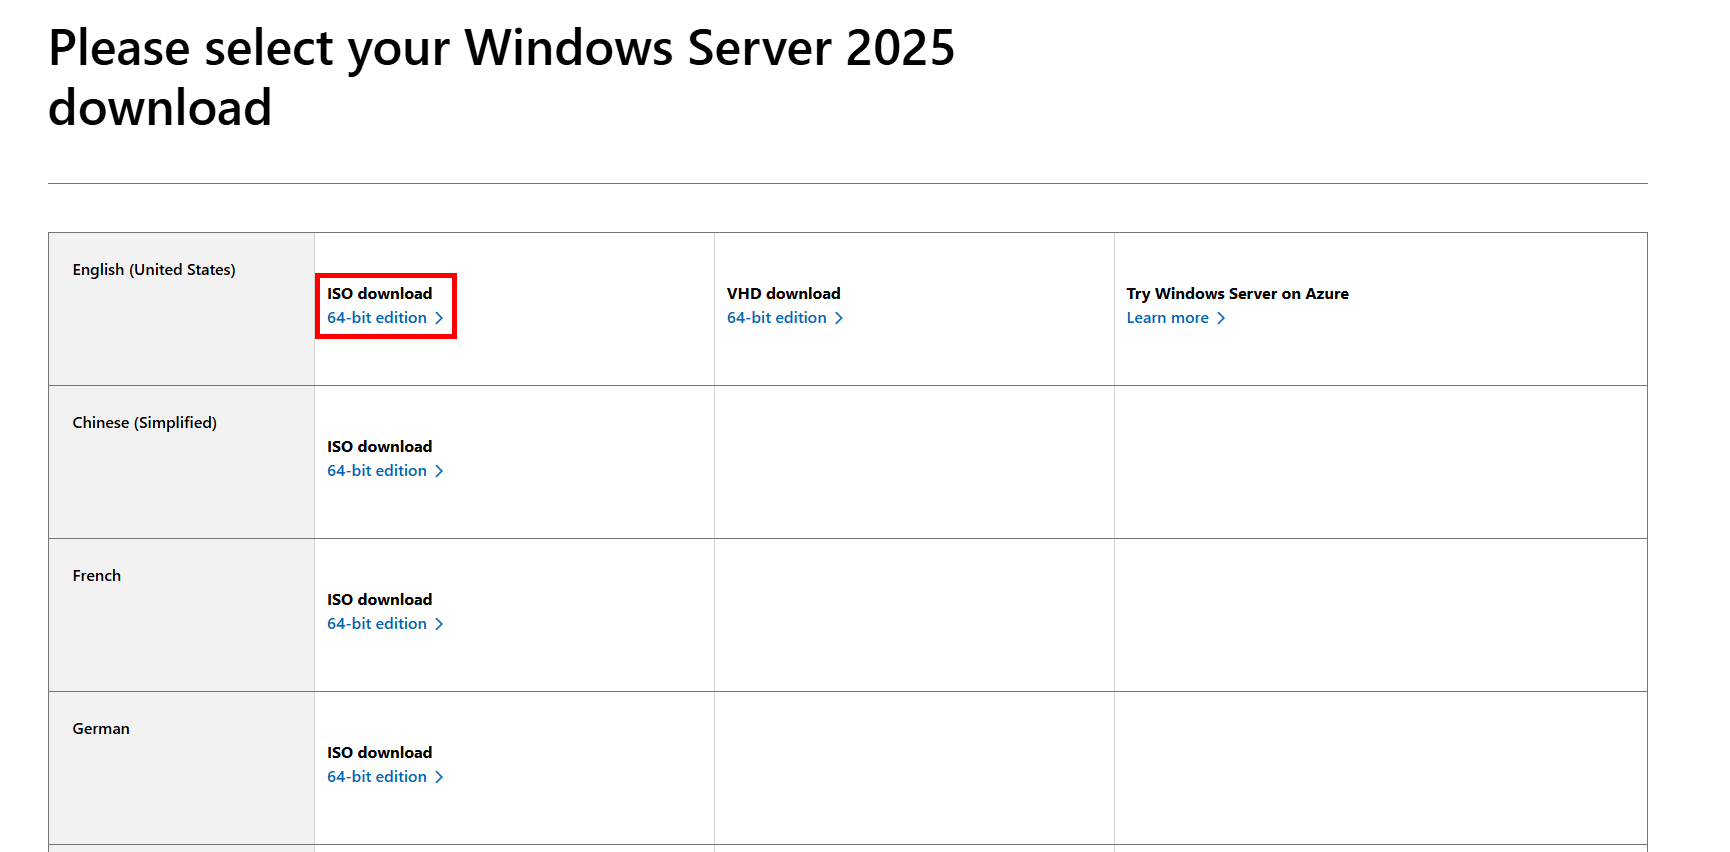
- Next, you’ll be prompted to select your language of choice. Practicing a foreign language? Try something other than English!
- Woot! We’ve finally beaten the Microsoft boss and gotten a freebie… for 180 days.
2. Create the Virtual Machine
For those who have never created a VM or are nervous about creating one, just know that whatever you do on your VM will not affect your local computer. VMs can be a great place to play, experiment, or test, as they can easily be blown away and recreated.
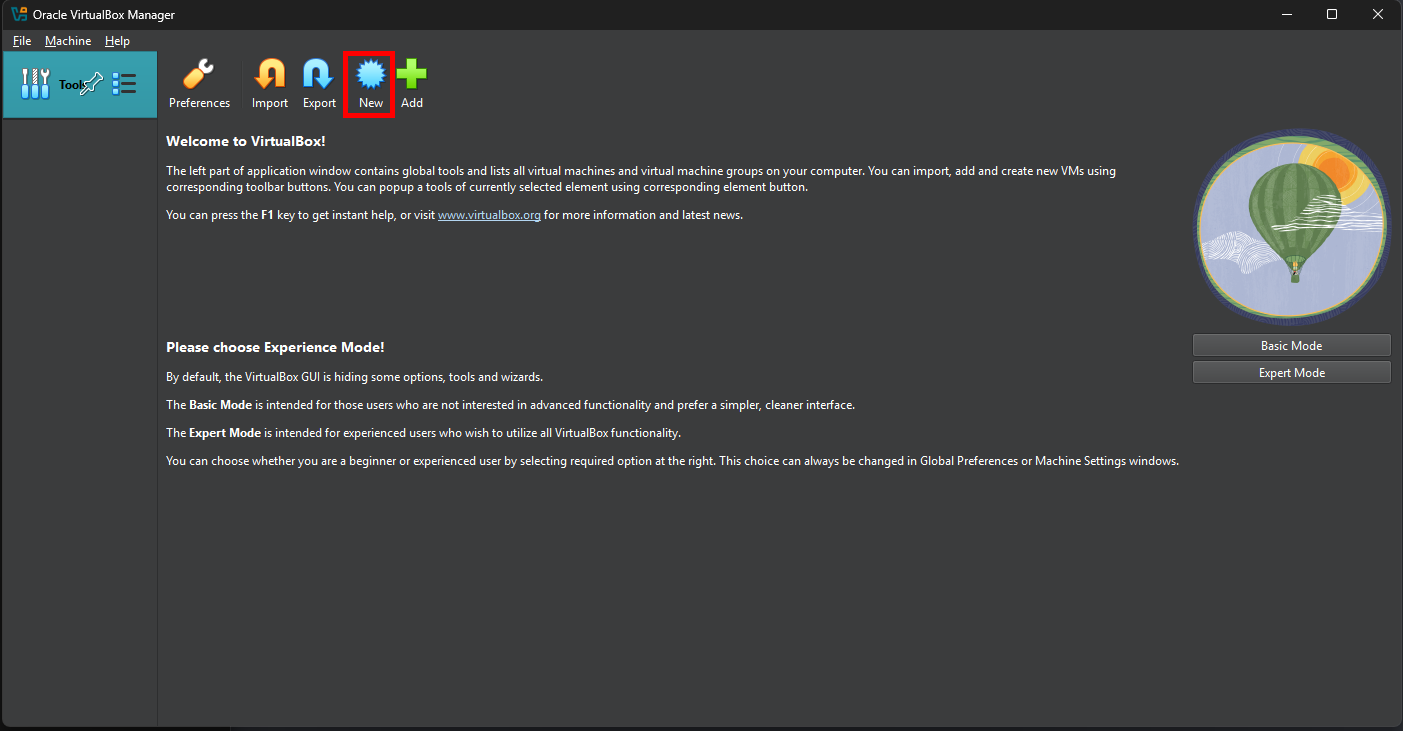
- Open VirtualBox and click New.
- Give your VM a name and select the evaluation edition of the Windows Server 2025 ISO file. Select the Desktop Experience edition so we have a GUI to work with and click Next.
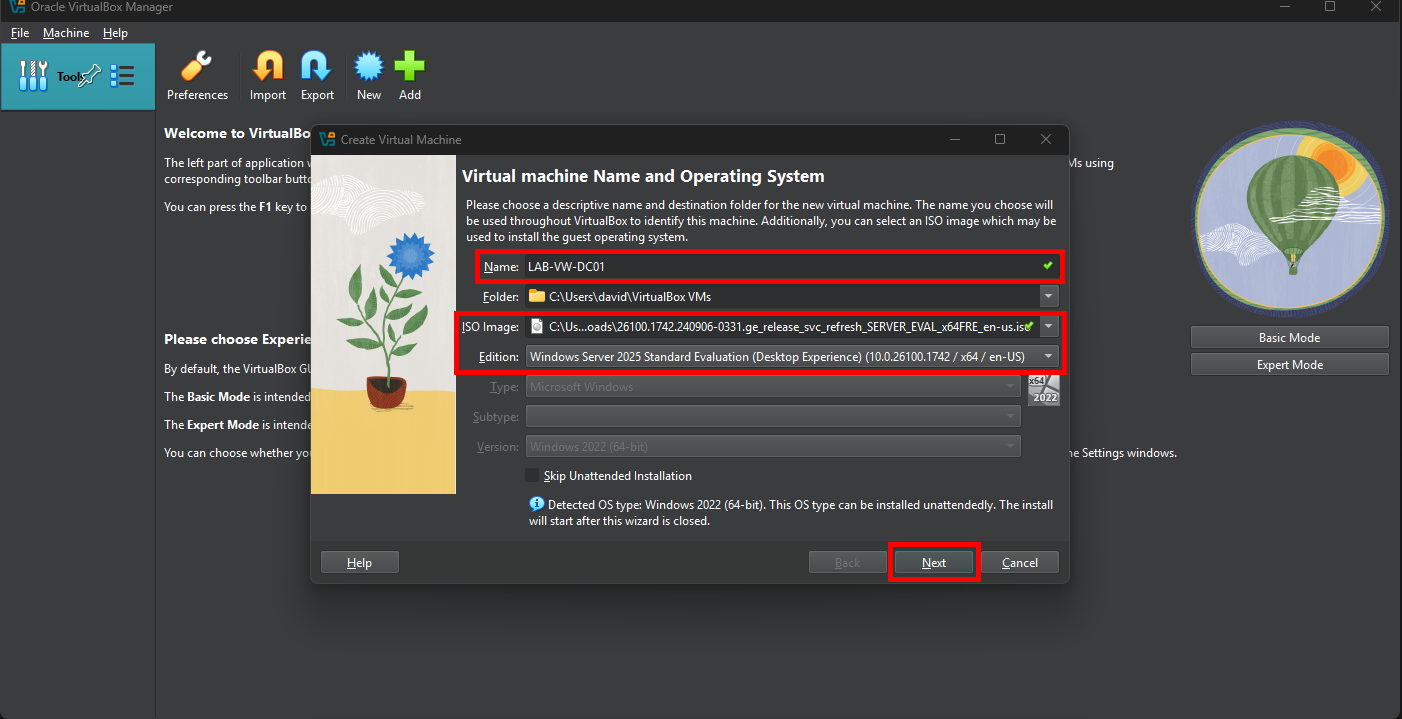
Find a descriptive naming convention that works for you. This will obviously differ from company to company, but having a good standard makes identification much easier.
LAB-VW-DC01, for instance, provides more information than may meet the eye. Here’s the breakdown:
LAB: Indicates the location of the server, or the lab. If this server was located in Equinix in Ashburn, VA, the name would be VA-VW-DC01.
VW: Denotes this is a virtual machine running a Windows operating system. For a physical Linux box, the name would then be LAB-PL-DC01.
DC01: Identifies it as the primary domain controller in the environment, or one of multiple domain controllers if more are added later. A second domain controller would be named LAB-VW-DC02.
- Now, create a username and password for your local user account. Shameless plug for my InfoSec guys and gals out there…NEVER leave a default username and password on anything. While we’re on this page, we’ll also select a domain name and check the Guest Additions checkbox. Finally, click Next.
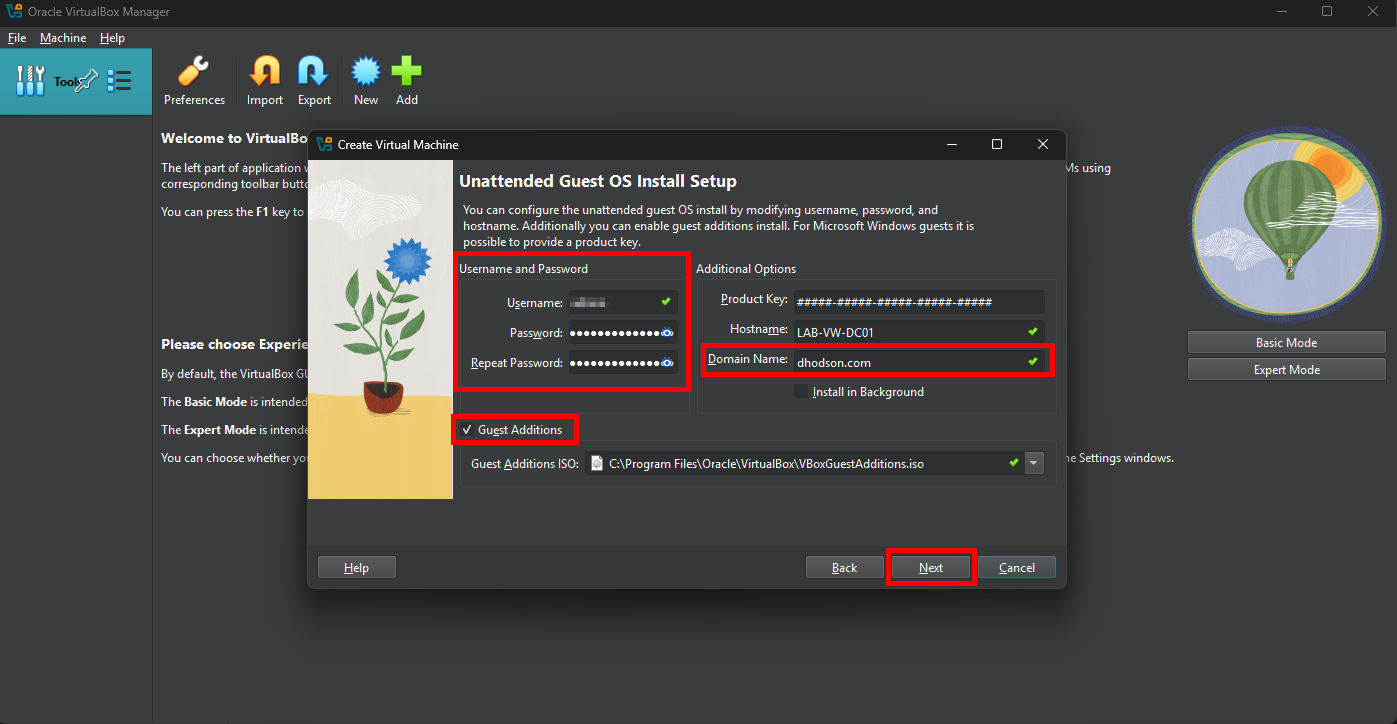
Some benefits of Guest Additions:
Improved performance, shared clipboard, shared folders between host and guest, mouse pointer integration, auto-resize of guest display, time sync between guest OS clock and host systems, and improved drivers.
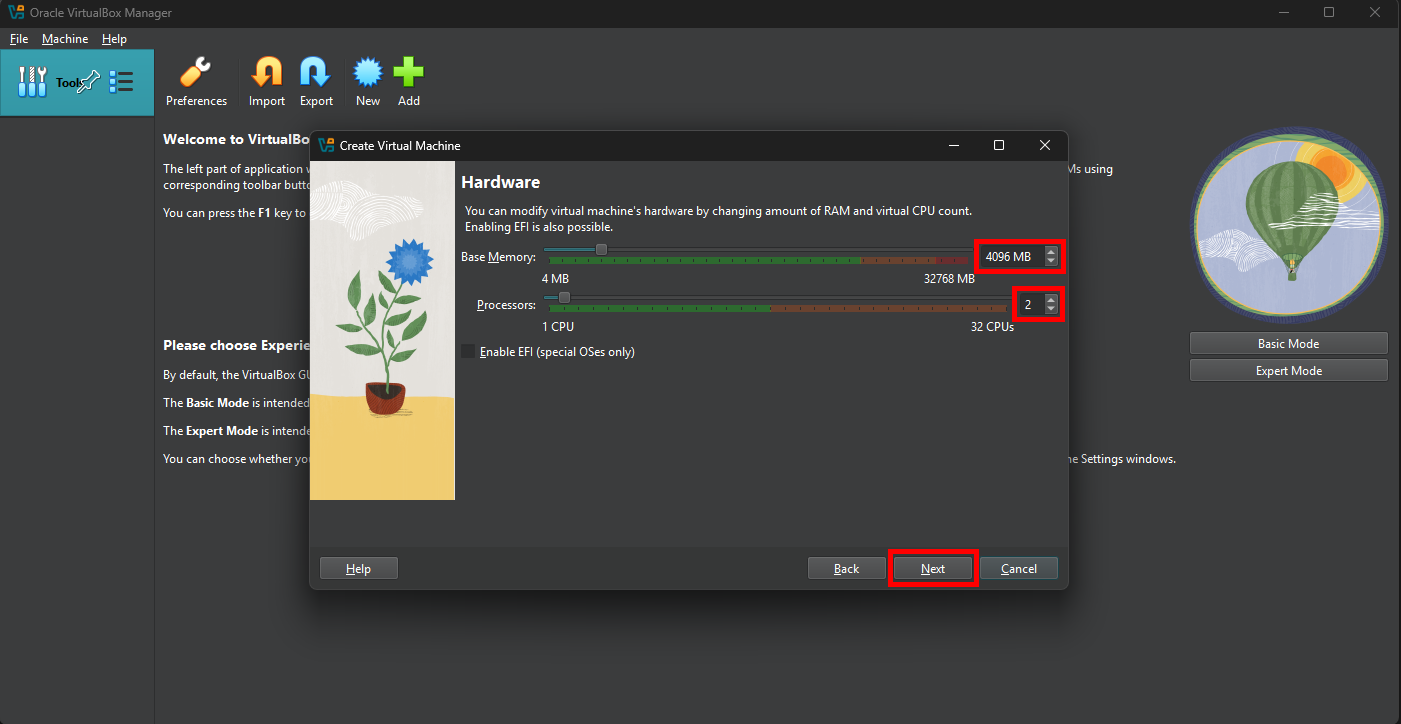
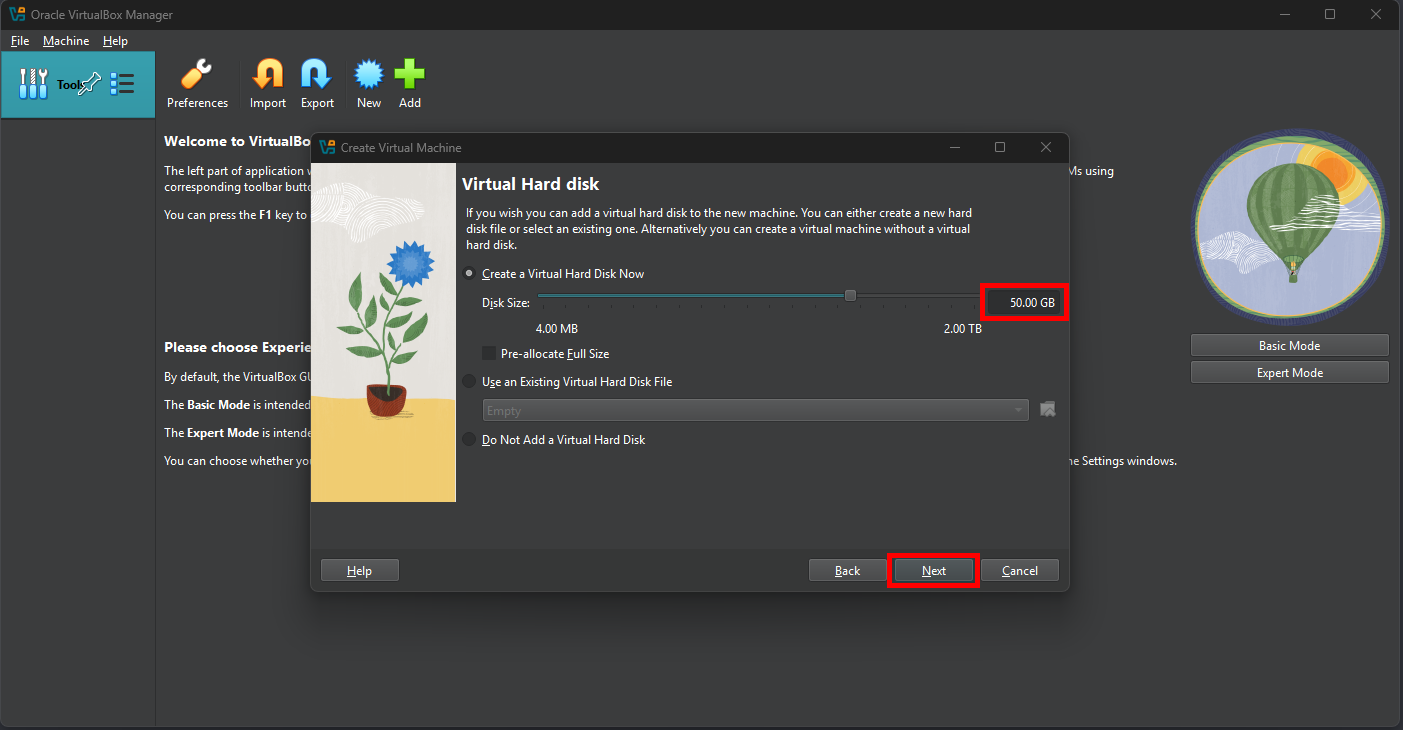
- Let’s give this puppy some hardware. Microsoft recommends 2 virtual CPUs (vCPUs), 4GB of memory, and 32GB of disk space for installations of Desktop Experience. I’ve increased the disk space on mine to 50GB. This is adjustable after the VM is created, so you can stick to minimum specs and add more if needed at a later date. Click Next after adjusting memory and vCPUs, and again after setting the disk size.
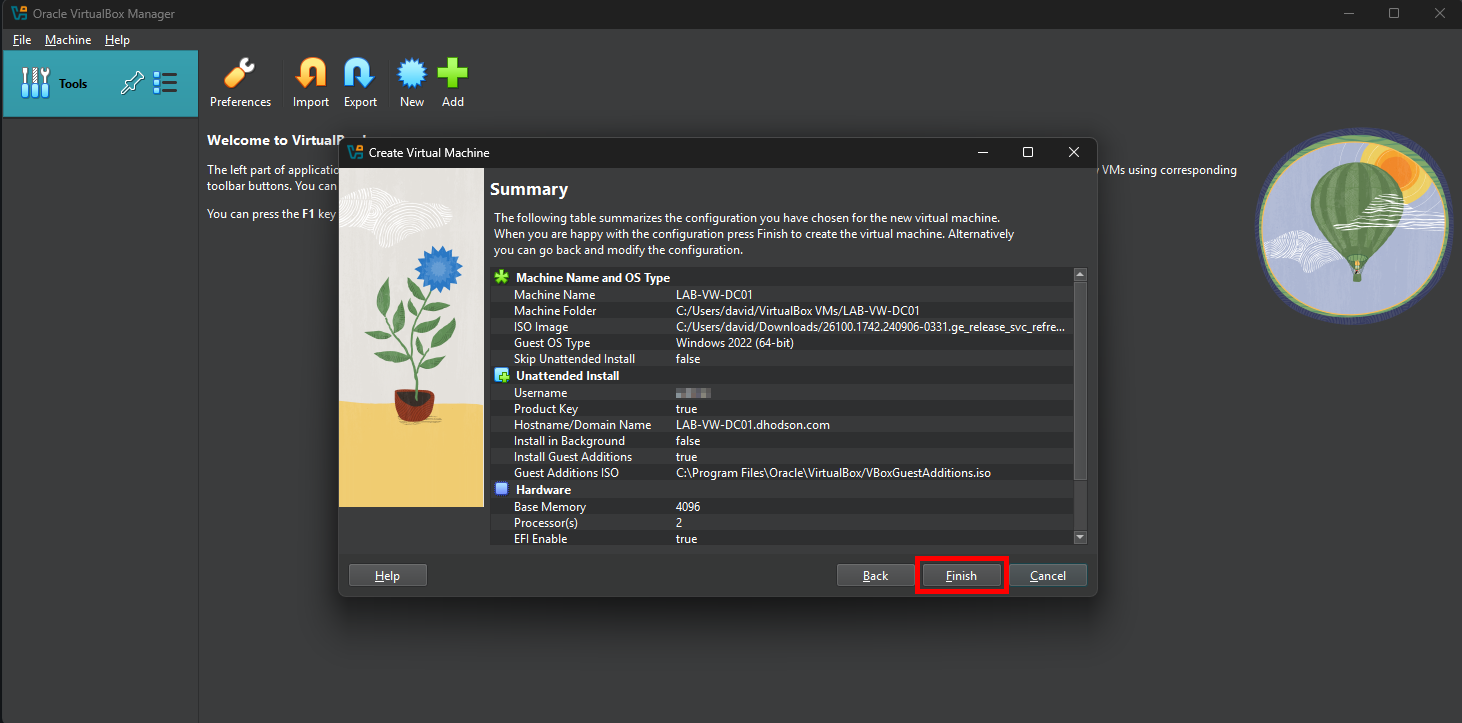
- Last, verify settings on the Summary page and hit Finish! The VM should now automatically boot up.
Windows Installation
Grab a coffee, walk the dog, or grab a Tolkien novel. We’re going to stare at this screen for a bit, but luckily for us, we just need to sit and wait!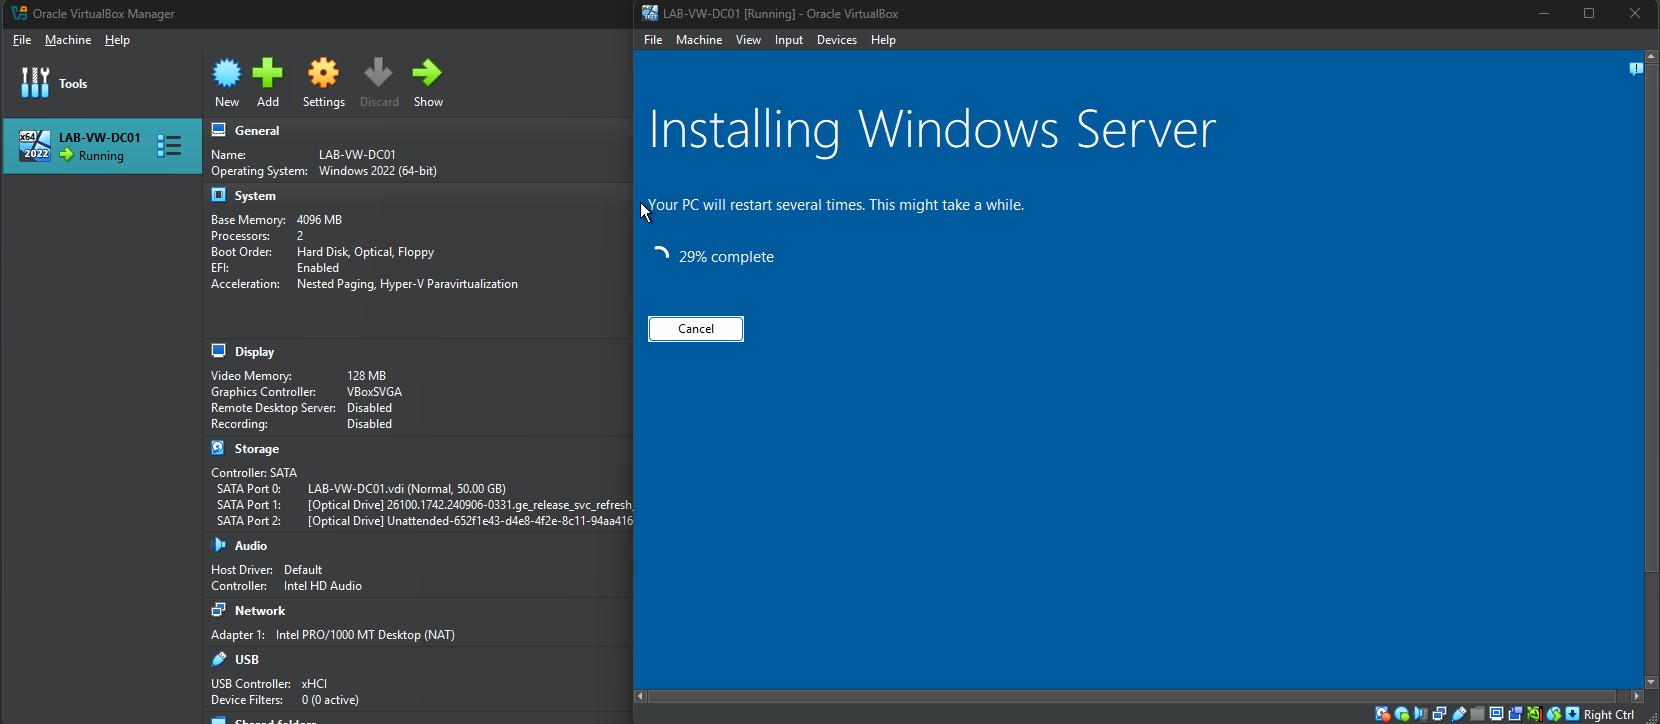
Be patient. The server may restart several times while working through the installation process. Do not power off the virtual machine during this process.
Post Installation Steps – Activate Evaluation Edition and Windows Updates
Activate Evaluation Edition
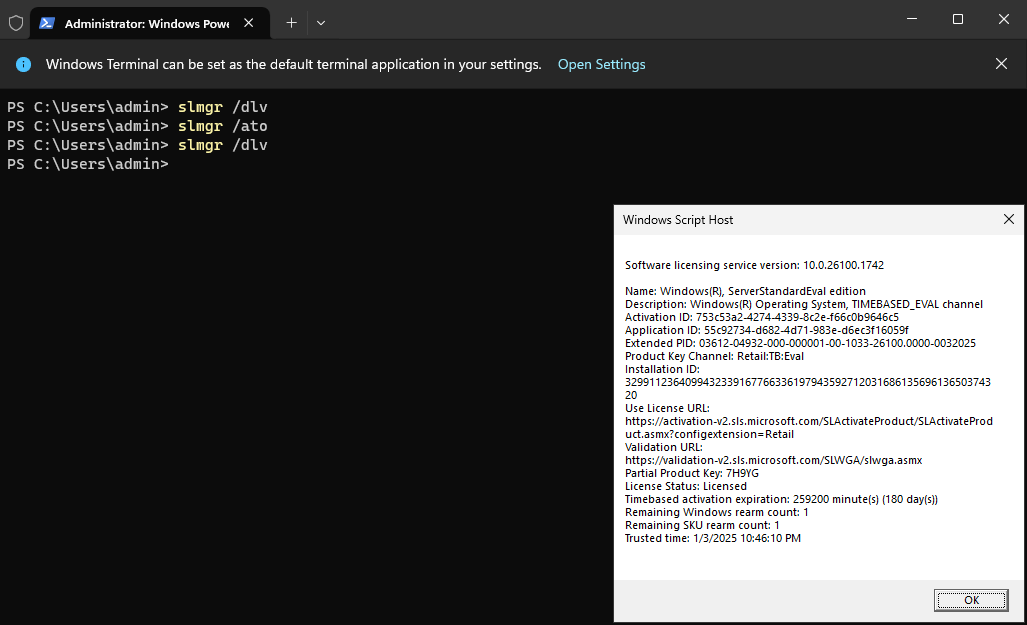
- Now that the installation is complete, log in to the VM with the previously created username and password. Open Windows Terminal as an administrator and input the following command:
slmgr /dlv
A pop-up will appear. Take note of the Time remaining field. You should see 10 day(s) as the time remaining. - To activate our Evaluation Edition and prevent shutdown after 10 days, input the following command into Windows Terminal:
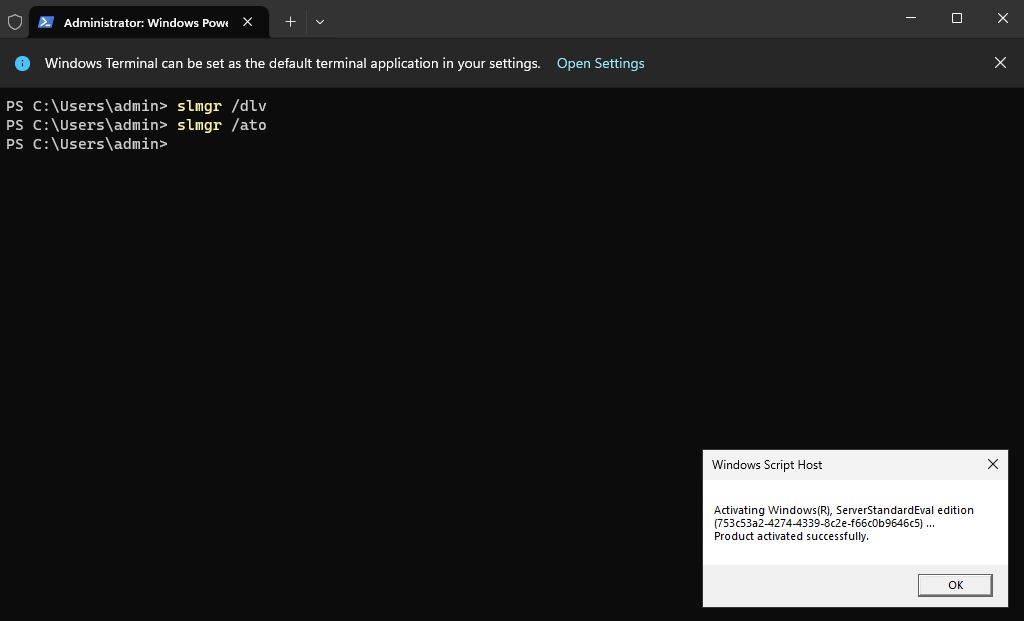
slmgr /ato
A new pop-up will appear stating the product was activated successfully. - To verify that activation was successful, run the
slmgr /dlvcommand again. You should now see a Time-based activation expiration field that is now at 180 days.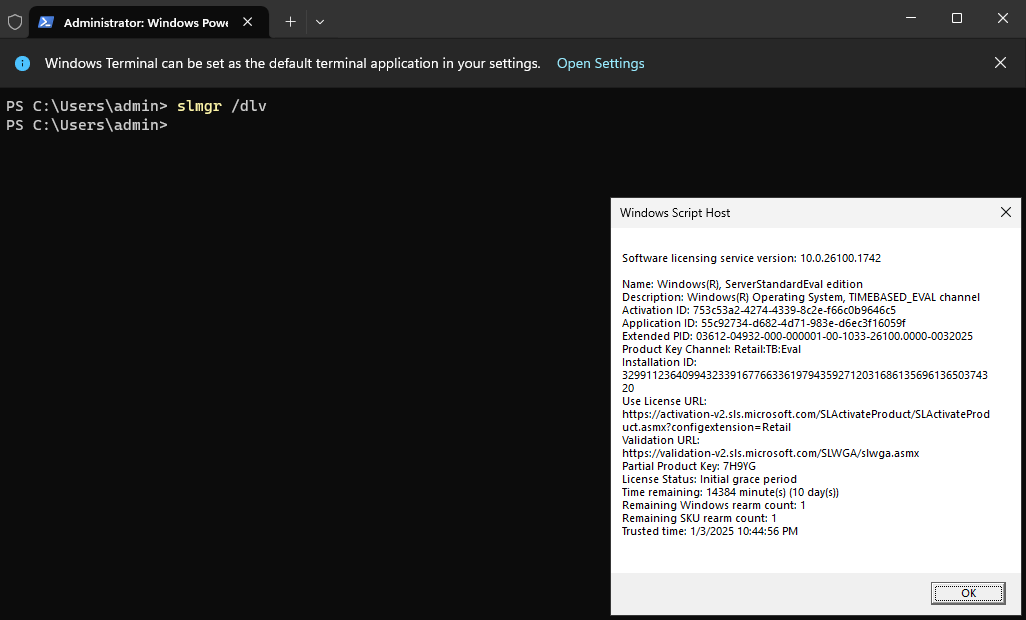
Windows Updates
Coffee break #2. Open up Windows Updates and download/install any pending updates. Make sure to click that Check for Updates button!
There we have it…a fully functional VM that will serve as our domain controller! Setting up our first domain controller is next on the list.
